In essence, vacuum tempering is a highly precise heat treatment process used after a metal part has already been hardened. It involves placing the hardened (quenched) workpiece into a vacuum furnace, reheating it to a specific temperature below its hardening point, holding it there, and then cooling it down. This critical step reduces the extreme brittleness caused by hardening, creating a final product that is both hard and tough.
The fundamental purpose of vacuum tempering is not to make steel harder, but to meticulously trade a small amount of its peak hardness for a significant increase in toughness and ductility, all within a perfectly clean, controlled environment that prevents surface contamination.
Why Tempering is Necessary After Hardening
To understand vacuum tempering, one must first understand why tempering itself is essential. The initial hardening process, known as quenching, creates a material that is exceptionally hard but also dangerously brittle.
The Problem of Brittleness
Quenching involves heating steel to a high temperature and then cooling it rapidly. This traps the steel's atoms in a very hard but stressed crystalline structure called martensite.
While this structure is excellent at resisting wear and abrasion, it is brittle like glass. A sharp impact could cause a fully hardened, untempered part to shatter.
The Goal: Balancing Hardness and Toughness
For most applications, a component needs a combination of properties. Hardness allows it to resist surface wear, while toughness allows it to absorb energy and resist fracturing.
Tempering is the solution. By reheating the steel, we allow the atomic structure to relax and rearrange slightly, forming more resilient microstructures like tempered martensite. This carefully reduces hardness while dramatically increasing toughness.
A Step-by-Step Breakdown of Vacuum Tempering
The use of a vacuum furnace makes this process exceptionally clean and precise. Each step is critical to achieving the desired outcome.
Step 1: Loading the Workpiece
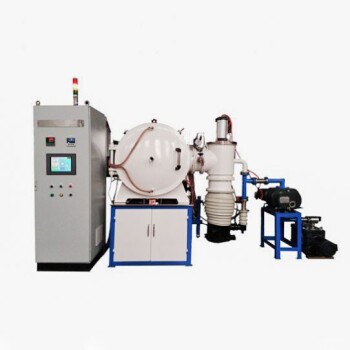
The process begins by placing the previously quenched and cleaned workpiece into the vacuum tempering furnace. The furnace door is then securely sealed.
Step 2: Creating the Vacuum
All atmospheric gases are pumped out of the furnace chamber. This evacuation continues until a specific working vacuum level is reached, ensuring no oxygen or other reactive gases remain.
Step 3: Controlled Reheating
The workpiece is heated according to a precise thermal profile. The final tempering temperature is the most critical variable, as it directly determines the final balance of hardness and toughness in the steel.
Step 4: Holding (Soaking)
Once the target temperature is reached, it is held constant for a predetermined amount of time. This "soaking" period ensures the entire part, including its core, reaches a uniform temperature for a complete microstructural transformation.
Step 5: Controlled Cooling
After the holding period, the part is cooled back to room temperature. This cooling can be done slowly within the furnace or more rapidly by introducing a high-purity inert gas like nitrogen or argon.
Understanding the Trade-offs: The Advantage of a Vacuum
Using a vacuum environment is a deliberate choice with distinct advantages and considerations compared to tempering in a standard atmosphere furnace.
Key Benefit: Preventing Oxidation
The primary advantage of the vacuum is the absence of oxygen. This completely prevents the formation of oxides (scale) on the part's surface.
The result is a clean, bright finish that often requires no subsequent cleaning operations like sandblasting or grinding, saving time and preserving tight dimensional tolerances.
Key Benefit: Ensuring Uniformity
A vacuum promotes highly uniform heating through radiation. With no air currents to create hot or cold spots, every surface of the component heats and cools at the same rate, leading to extremely consistent and repeatable material properties.
Limitation: Cost and Complexity
The main trade-off is equipment cost and complexity. Vacuum furnaces are a significant investment and require more sophisticated operation and maintenance than their atmospheric counterparts. This makes the process more suitable for high-value or mission-critical components where precision is paramount.
How to Apply This to Your Project
The decision to use vacuum tempering depends entirely on the required quality and performance of the final component.
- If your primary focus is a clean, bright finish with no surface oxidation: Vacuum tempering is the ideal choice, as it eliminates the need for post-process cleaning.
- If your primary focus is achieving highly consistent and repeatable material properties: The precise temperature control and uniform heating in a vacuum environment guarantee superior results.
- If your primary focus is processing high-alloy or sensitive steels: A vacuum is essential to prevent unwanted surface reactions that can compromise the material's integrity.
Ultimately, choosing vacuum tempering is an investment in precision, ensuring your component achieves its exact intended balance of strength and durability without surface contamination.
Summary Table:
| Step | Key Action | Purpose |
|---|---|---|
| 1. Loading | Place quenched part in vacuum furnace | Prepare for clean, controlled heat treatment |
| 2. Vacuum Creation | Remove all atmospheric gases | Prevent oxidation and surface contamination |
| 3. Reheating | Heat to specific tempering temperature | Initiate microstructural transformation |
| 4. Soaking | Hold at temperature for set time | Ensure uniform transformation throughout the part |
| 5. Cooling | Cool slowly or with inert gas | Lock in the final balance of hardness and toughness |
Need to achieve the perfect balance of hardness and toughness for your critical components?
At KINTEK, we specialize in providing advanced vacuum tempering solutions and lab equipment that deliver superior results. Our expertise ensures your high-value metal parts achieve exceptional material consistency and a bright, clean finish—free from oxidation.
Contact us today using the form below to discuss how our precision equipment can enhance your laboratory's capabilities and meet your specific project requirements.
Related Products
- Vacuum Heat Treat Furnace and Levitation Induction Melting Furnace
- Molybdenum Vacuum Heat Treat Furnace
- 2200 ℃ Tungsten Vacuum Heat Treat and Sintering Furnace
- Vacuum Heat Treat Furnace with Ceramic Fiber Liner
- 2200 ℃ Graphite Vacuum Heat Treat Furnace
People Also Ask
- What are the five common heat treatments of metals? Master the Processes for Precise Material Properties
- What is a vacuum heat treatment furnace? The Ultimate Guide to Controlled Atmosphere Processing
- What is low temperature vacuum? A Guide to Precision, Oxide-Free Thermal Processing
- What is a vacuum furnace used for? Unlock High-Purity Heat Treatment for Superior Materials
- What is the difference between annealing and hardening? Master the Key Heat Treatment Processes