Introduction to Rotary Evaporator Infusions
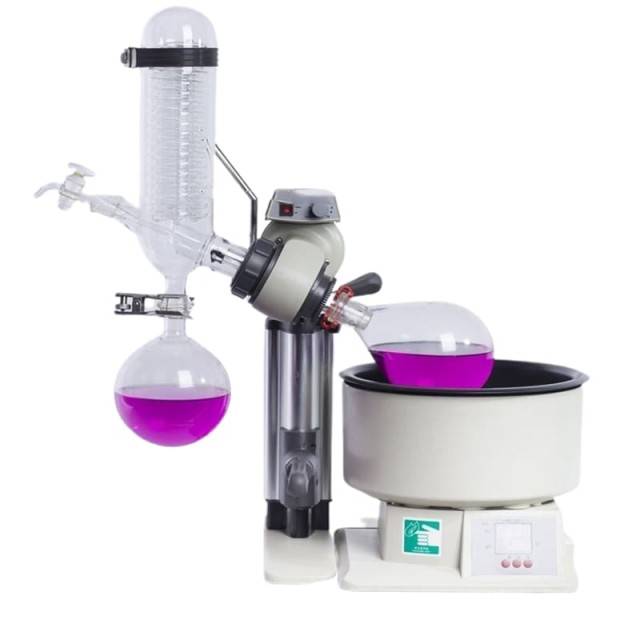
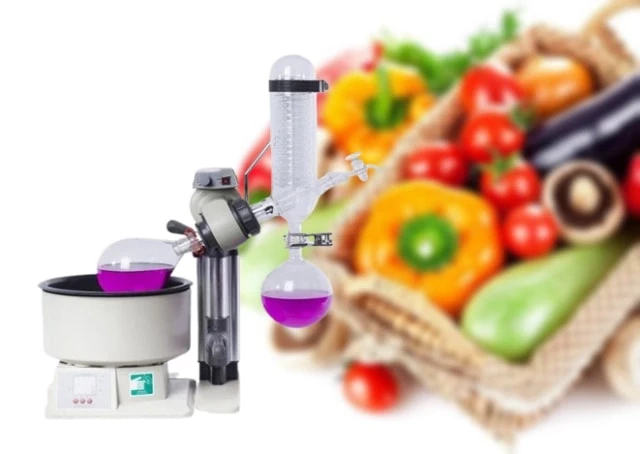
Rotary evaporator infusions are a popular way to create flavorful tinctures, extracts, and infusions. A rotary evaporator is a device that uses vacuum and heat to remove solvents from samples, leaving behind a concentrated extract. This process is ideal for creating infusions because it minimizes the risk of overheating and damaging the ingredients. By controlling the vacuum, rotation speed, and heating temperature, you can create infusions with a wide range of flavors and potencies. In this blog post, we will walk you through the steps of creating delicious infusions with a rotary evaporator.
Table of Contents
- Introduction to Rotary Evaporator Infusions
- Set Up Your Rotary Evaporator
- Step 1: Choose your ingredients
- Step 2: Prepare your flask
- Step 3: Add solvent
- Step 4: Set up the condenser
- Step 5: Elevate your vacuum pump
- Step 6: Hook up your tube
- Step 7: Add a closing and opening valve
- Step 8: Set up the cold trap
- Step 9: Attach the flask and bump trap
- Step 10: Lower your flask into a water bath
- Prepare Your Ingredients
- Add Ingredients to Round Bottom Flask
- Adjust Rotation Speed
- Adjusting Vacuum Strength for Creating Delicious Infusions with a Rotary Evaporator
- Adjust Water Bath Heat
- Monitor and Adjust as Needed
- Remove Infused Solution from Rotary Evaporator
- Enjoy Your Delicious Infusion!
Set Up Your Rotary Evaporator
Setting up your rotary evaporator is the first step to creating delicious infusions. Here is a step-by-step guide on how to do it:

Step 1: Choose your ingredients
Pick fresh herbs or fruits that have a strong flavor and aroma. Wash and dry them thoroughly before use.
Step 2: Prepare your flask
Attach the round-bottom flask to the rotary evaporator and make sure it's securely in place. Ensure that the flask is double the volume of your sample.
Step 3: Add solvent
Choose a solvent that's compatible with your ingredients. For example, if you're using herbs, ethanol or methanol would be a good choice. Add enough solvent to cover the ingredients.
Step 4: Set up the condenser
Attach the condenser to the rotary evaporator and make sure it's securely in place.
Step 5: Elevate your vacuum pump
Ensure that your vacuum pump is above the traps. This will aid in keeping your solvent out of your pump.
Step 6: Hook up your tube
Attach the vacuum pump and the recirculating water bath (5-gallon bucket) to the rotary evaporator. Check that the power strip is turned on and plugged in.
Step 7: Add a closing and opening valve
Add a closing and opening valve in between the vacuum pump and the last trap. This will aid in removing solvent from your trap.
Step 8: Set up the cold trap
Fill the rotary evaporator's cold traps with dry ice. Verify that the bump trap is clean and dry.
Step 9: Attach the flask and bump trap
Attach the flask and bump trap to the adapter portion of the rotary evaporator and secure it with a Keck clip. This feature will prevent your solution from entering the main part of the rotary evaporator.
Step 10: Lower your flask into a water bath
Lower your flask into the water bath. This aims at preventing your flask from disconnecting.
By following these steps, you can set up your rotary evaporator and start creating delicious infusions. Keep in mind that safety is important when working with solvents, so make sure to follow the manufacturer's instructions and wear appropriate protective gear. Happy experimenting!
Prepare Your Ingredients
To create delicious infusions using a rotary evaporator, you need to start by preparing your ingredients properly. Follow these simple steps to ensure your ingredients are ready for the infusion process:
Step 1: Select high-quality, fresh ingredients
Choose ingredients that are free from blemishes, bruises, or signs of spoilage. Whether you're working with fruits, vegetables, herbs, or spices, it's important to select ripe and fresh ingredients that will give your infusions the best flavor.

Step 2: Clean and prep your ingredients
Wash and chop your fruits and vegetables, or dry and crush your herbs and spices. By maximizing the surface area of your ingredients, you increase their exposure to the solvent during the infusion process. Be sure to follow any specific instructions for preparing your ingredients, as certain herbs or spices may require different techniques.
Step 3: Choose the right solvent
Select the appropriate solvent for your ingredients. The solvent you choose will depend on the type of ingredient you're working with and the flavor you want to achieve. Some common solvents include ethanol, methanol, and hexane.
Step 4: Determine the best infusion method
There are different methods for infusing ingredients with a rotary evaporator. You can choose to use a cold infusion method, which involves soaking your ingredients in solvent at room temperature for an extended period. Or you can use a hot infusion method, which involves heating your ingredients and solvent together.
Step 5: Experiment with different flavors
Once you've mastered the basics of preparing your ingredients and infusing them using a rotary evaporator, don't be afraid to experiment with different flavors. Try using different combinations of fruits, vegetables, herbs, and spices to create unique and delicious infusions.
By following these simple steps, you can prepare your ingredients for a successful rotary evaporation process and create delicious and flavorful infusions.
Add Ingredients to Round Bottom Flask
To create a delicious infusion with a rotary evaporator, you need to add your chosen ingredients to the round bottom flask, along with the solvent of your choice. Follow these simple steps:
Step 1: Choose Your Ingredients
The first step is to choose the ingredients you want to use for your infusion. You can use a variety of ingredients, including fruits, herbs, and spices. Make sure to choose high-quality ingredients and wash them thoroughly before use.

Step 2: Add Your Ingredients to the Flask
Once you have your ingredients, add them to the round bottom flask. Make sure not to overfill the flask, as this can cause the mixture to boil over during the heating process. A good rule of thumb is to fill the flask no more than halfway.
Step 3: Choose Your Solvent
Next, you need to choose a solvent that is compatible with your ingredients and will not affect their flavor or aroma. Common solvents used for infusions include ethanol, water, and oil. Make sure to choose a high-quality solvent that is suitable for your ingredients.
Step 4: Add Your Solvent to the Flask
Once you have your solvent, add it to the round bottom flask with your ingredients. The solvent will act as a carrier, allowing the flavors and aromas of the ingredients to be extracted and concentrated.
Step 5: Heat and Agitate the Mixture
After adding the ingredients and solvent to the flask, the rotary evaporator can be used to heat and agitate the mixture. This causes the solvent to vaporize and leave behind a concentrated infusion. Make sure to follow the instructions of the rotary evaporator manufacturer for the specific heating and agitation settings.
Step 6: Collect Your Infusion
As the solvent evaporates, the resulting infusion will collect in the condenser and drip into the receiving flask. Once the infusion is complete, turn off the heating and agitation and remove the receiving flask. The infusion can now be used in a variety of culinary applications, such as cocktails, sauces, and desserts.
By following these simple steps, you can create unique and delicious infusions with a rotary evaporator. Remember to always use high-quality ingredients and solvents, and follow the manufacturer's instructions for your specific rotary evaporator model.
Adjust Rotation Speed
The rotation speed of a rotary evaporator plays a vital role in creating delicious infusions. By adjusting the rotation speed, you can control the quality of the final product. Here are the steps to adjust the rotation speed of a rotary evaporator:
Step 1: Understanding the Impact of Rotation Speed
The rotation speed of a rotary evaporator has a significant impact on the quality of the final product. A faster rotation speed can help to remove solvents quickly, while a slower speed can preserve the delicate flavors and aromas of the infusion. It is important to note that the optimal rotation speed will vary depending on the specific infusion being created.
Step 2: Starting with a Slower Speed
To find the right rotation speed, it is recommended to start with a slower speed and gradually increase it until the desired outcome is achieved. Starting with a slower speed helps to preserve the delicate flavors and aromas of the infusion.
Step 3: Monitoring the Rotation Speed
It is important to monitor the rotation speed throughout the process to ensure that it remains consistent. Consistency is essential in creating a high-quality product.
Step 4: Adjusting the Rotation Speed Gradually
If the desired outcome is not achieved, adjust the rotation speed gradually until you find the optimal rotation speed for the specific infusion being created.
In general, a speed of 250–280 rpm is recommended for maximum turbulence in benchtop-scale rotary evaporators, but factors such as solvent and sample consistency, flask size, and fill level may change this. It is important to note that using too fast a speed can cause premature wear on the equipment. Therefore, it is essential to find the optimal rotation speed for the specific infusion being created to ensure the equipment's longevity.
By following these steps, you can adjust the rotation speed of a rotary evaporator to create delicious infusions that are both flavorful and aromatic.

Adjusting Vacuum Strength for Creating Delicious Infusions with a Rotary Evaporator
When using a rotary evaporator to create infusions, adjusting the vacuum strength is a crucial step to achieve the desired results. Here's how to adjust the vacuum strength for creating delicious infusions with a rotary evaporator:
Step 1: Understand the Basic Principle of Rotary Evaporator
A rotary evaporator is a laboratory instrument used to extract solvents from a sample by evaporating them under reduced pressure. When preparing infusions, the rotary evaporator is used to extract flavors and aromas from herbs, fruits, and other ingredients to create concentrated extracts that can be used to flavor food and drinks.
Step 2: Adjust the Vacuum Strength
To adjust the vacuum strength, the operator must adjust the pressure within the rotary evaporator using the vacuum control valve. Increasing the vacuum strength will increase the rate of evaporation, while decreasing it will slow it down. It is important to find the right balance between the vacuum strength and temperature to ensure that the infusion is extracted efficiently without damaging the flavor and aroma of the ingredients.
Step 3: Experiment with Different Settings
By adjusting the vacuum strength, the operator can create infusions with different flavors and strengths, allowing them to experiment with different recipes and create unique flavors for their customers. It is important to note that the optimal vacuum strength will depend on the ingredients being used, so it may take some trial and error to find the perfect setting for each infusion.

Step 4: Monitor the Process
Once the vacuum strength has been adjusted, it is important to monitor the process closely to ensure that the infusion is being extracted efficiently without any loss of flavor or aroma. The operator can adjust the temperature and vacuum strength as needed during the process to achieve the desired results.
Step 5: Finish the Process
Once the infusion has been extracted, it can be transferred to a storage container and used to flavor food and drinks. The remaining solvent can be removed using a rotary evaporator or another distillation method.
By following these steps to adjust the vacuum strength, the operator can create delicious infusions with a rotary evaporator that are sure to impress their customers and elevate their culinary creations.
Adjust Water Bath Heat
Creating delicious infusions with a rotary evaporator requires careful control of the water bath heat. The water bath is the container in which the sample flask is placed and heated. By adjusting the heat, you can control the temperature at which the sample is evaporated.
Step 1: Understanding Boiling Points
Different compounds have different boiling points, and some evaporate at lower temperatures than others. By adjusting the water bath heat, you can selectively evaporate the compounds that contribute to the flavor of your infusion while leaving behind undesirable compounds.

Step 2: Setting the Ideal Temperature
The ideal temperature for creating infusions varies depending on the type of compound you are trying to extract, but a good starting point is 50-60°C. It is important to note that the rotary evaporator should only be used for food-grade solvents and that the final product should be thoroughly tested for safety before consumption.
Step 3: Experimentation and Control
With some experimentation and careful control of the water bath heat, you can create delicious infusions that are sure to impress your friends and colleagues.
To adjust the water bath heat, follow these simple steps:
- Fill the water bath with distilled water, ensuring that the level is above the minimum line.
- Turn on the rotary evaporator and set the desired temperature on the water bath controller.
- Allow the water bath to heat up to the desired temperature.
- Once the water bath has reached the desired temperature, carefully place the sample flask into the water bath.
- Monitor the temperature of the water bath and adjust it as necessary throughout the infusion process.
By following these steps, you can create flavorful infusions that are sure to impress. Just remember to use only food-grade solvents and to thoroughly test the final product for safety before consumption.
Monitor and Adjust as Needed
To create a perfect infusion with a rotary evaporator, it is crucial to monitor the process carefully and adjust as needed. Here's how you can do it:
Step 1: Monitor the Temperature
As you begin the process of infusing your ingredients into your chosen alcohol or oil, keep a close eye on the temperature of the flask. The temperature should be set to a level that is appropriate for the ingredients you are using. If you notice that the temperature is too high or too low, adjust it accordingly.
Step 2: Adjust the Flow Rate
The flow rate of the liquid also needs to be monitored and adjusted as needed. If the flow rate is too slow, it could result in a weak infusion. On the other hand, if the flow rate is too fast, it could lead to the loss of some of the flavors and aromas from the ingredients. Hence, it is important to adjust the flow rate to ensure that the infusion is just right.
Step 3: Add More Ingredients
If you feel that the infusion is not strong enough, you can always add more ingredients to the flask. This can include additional fruits, herbs, spices, or other flavorings. However, it is important to add the ingredients slowly and in small amounts, so as not to overwhelm the liquid.
Step 4: Taste Test
After the infusion process is complete, it is a good idea to taste test the liquid to ensure that the flavors are balanced and to your liking. If you find that the infusion is too weak, you can always repeat the process with additional ingredients. On the other hand, if the infusion is too strong, you can dilute it with more alcohol or oil.

Step 5: Store the Infusion
Once you have created your perfect infusion, it is important to store it properly. Most infusions can be stored in a cool, dry place for up to several months. However, some infusions may require refrigeration or freezing to maintain their freshness and flavor.
In conclusion, by monitoring and adjusting the temperature, flow rate, and ingredients, you can create delicious infusions with a rotary evaporator that are perfect for cocktails, cooking, and more. With a little practice and experimentation, you can become an expert at using a rotary evaporator to create unique and flavorful infusions.
Remove Infused Solution from Rotary Evaporator
Removing the infused solution from the rotary evaporator requires careful handling and attention to detail. Follow these steps to safely and effectively remove the infused solution:
Step 1: Turn off the Rotary Evaporator
Before removing the flask containing the infused solution, ensure that the rotary evaporator is turned off.
Step 2: Disconnect the Flask
Carefully disconnect the flask containing the infused solution from the rotary evaporator. Take care when handling the flask as the contents may still be hot.
Step 3: Extract the Infused Solution
Using a pipette or syringe, extract the infused solution from the flask. Be sure to label the solution with the date and ingredients used for future reference.
Step 4: Store the Solution Properly
Once the infused solution has been extracted from the rotary evaporator, store it in an airtight container in a cool, dark place. Proper storage will ensure the freshness and longevity of the solution.
Step 5: Use the Infused Solution
The infused solution can be used in a variety of culinary applications such as cocktails, sauces, and dressings. With a little creativity and experimentation, a rotary evaporator can unlock a world of delicious and unique infused flavors for any culinary enthusiast to enjoy.
By following these steps, you can safely and effectively remove the infused solution from the rotary evaporator and utilize it in your culinary creations. Be sure to handle the solution with care and label it properly for future reference.
Enjoy Your Delicious Infusion!
Now that you have created your delicious infusion with a rotary evaporator, it's time to enjoy it! Here are some tips to help you make the most of your flavorful creation:

1. Cocktail Time
Infused spirits are perfect for creating unique and tantalizing cocktails. Try mixing your infusion with your favorite spirit and some simple syrup to create a delicious and refreshing drink. You can also experiment with different flavor combinations to find your perfect cocktail.
2. Cooking with Infusions
Infusions can also be used in cooking to add depth and complexity to your dishes. Try using your infusion as a marinade for meats, drizzling it over roasted vegetables, or adding it to sauces and dressings. The possibilities are endless, and you're sure to impress your dinner guests with your flavorful creations.
3. Sipping and Savoring
Sometimes the best way to enjoy an infusion is to simply sip and savor it on its own. Pour yourself a small glass and take your time to appreciate the complex flavors and aromas. You can also try serving your infusion with a charcuterie board or other small bites to enhance the flavor experience.
4. Storing Your Infusion
To ensure your infusion stays fresh and flavorful, it's important to store it properly. Transfer your infusion to a clean, airtight container and store it in the refrigerator. It's best to consume your infusion within a few weeks to ensure optimal flavor.
With these tips, you're sure to make the most of your delicious infusion created with a rotary evaporator. Whether you're mixing cocktails, cooking up a storm, or savoring it on its own, your infusion is sure to impress.
Related Products
Related Articles
- Step-by-Step Guide to Operating a Short Path Distillation Apparatus
- How Rotary Evaporator is Different from Conventional Distillation
- Why Tap Water Chilling Is Not Enough for Your Rotavap
- The Importance of Water Distillation in the Laboratory: Ensuring Purity and Quality for Accurate Results
- How Rotary Evaporators are Revolutionizing Distillation


