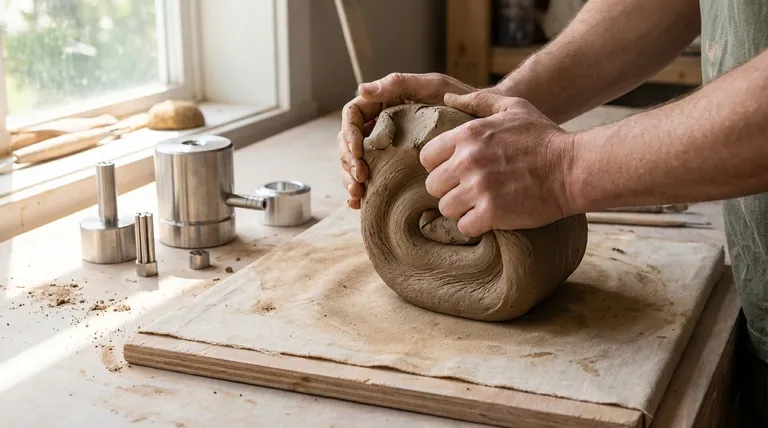
To mold pottery clay, you must first prepare it through a process called wedging. This involves repeatedly pressing, rolling, and folding the clay on a porous surface. The goal is to remove air bubbles and create a perfectly uniform consistency, which is the essential first step before you begin shaping your piece.
The initial "molding" of clay is not about shaping it into a final form, but about conditioning it. This crucial preparation, known as wedging, ensures the clay is free of air pockets and has an even texture, which is the single most important factor in preventing cracks or explosions during firing.
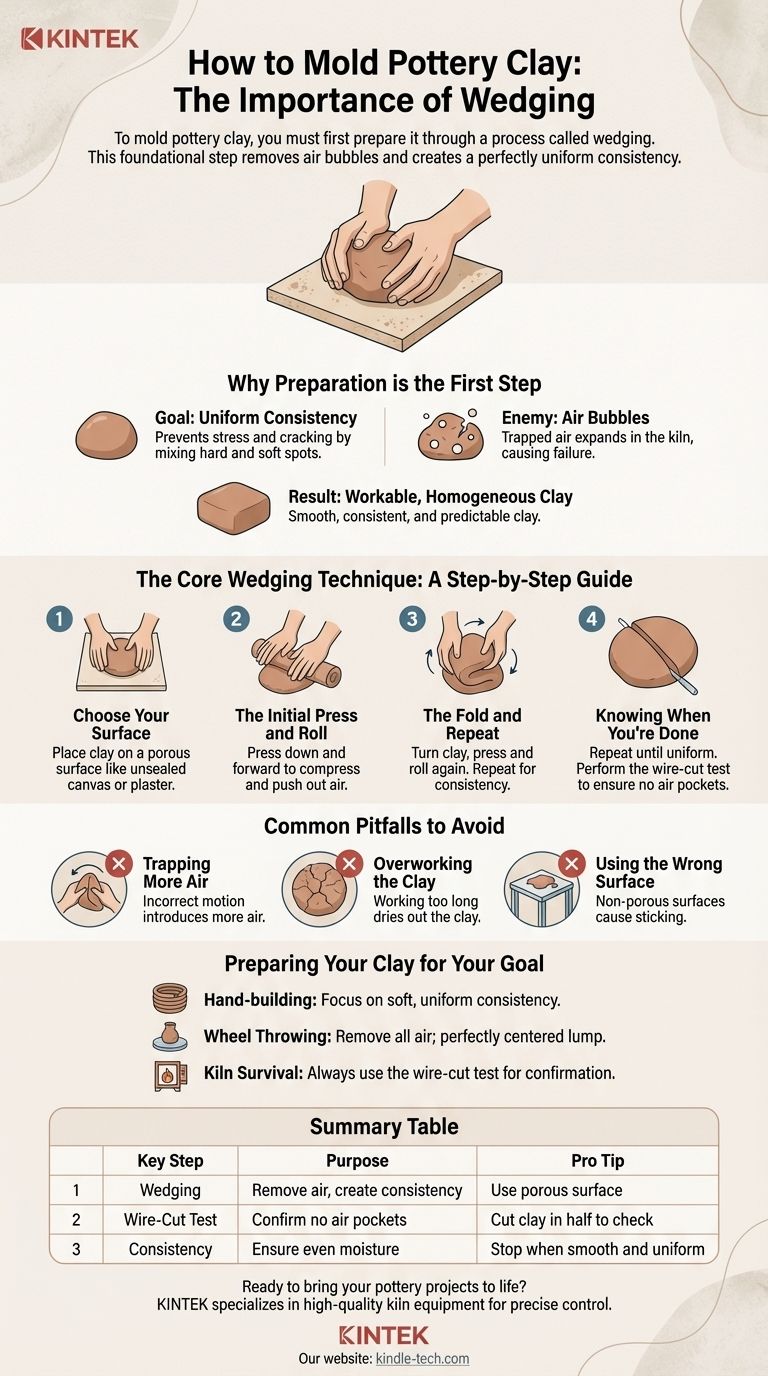
Why Preparation is the First Step
Before you can shape clay on a wheel or by hand, you must prepare it. This process is often called wedging or kneading, and it addresses two critical issues that can ruin a finished piece.
The Goal: Uniform Consistency
Clay straight from the bag or a reclaim bucket can have harder and softer spots. Wedging mixes these sections together, ensuring the entire lump has the same moisture level and workability. This uniformity prevents stress and cracking as the piece dries and is fired.
The Enemy: Air Bubbles
Air bubbles are the primary cause of failure in pottery. As the clay is heated in a kiln, any trapped air and the moisture within it will expand rapidly. If it cannot escape, the pressure will cause your piece to crack or even explode, potentially damaging other work in the kiln.
The Result: Workable, Homogeneous Clay
Properly wedged clay feels smooth and consistent. It has a uniform color with no streaks or marbling from different moisture levels. When you begin to shape it, it will respond predictably without weak spots.
The Core Wedging Technique: A Step-by-Step Guide
This foundational method is perfect for beginners and small to medium amounts of clay. It directly addresses the goal of removing air and creating consistency.
Step 1: Choose Your Surface
Place your lump of clay on a porous surface. A piece of unsealed canvas, concrete, or a dedicated plaster wedging board is ideal. These surfaces absorb a small amount of water, which prevents the clay from sticking as you work.
Step 2: The Initial Press and Roll
Using the heels of your palms, press down and forward into the lump of clay. Roll the lump toward you in a single, smooth motion. The idea is to compress the clay and push any internal air pockets out.
Step 3: The Fold and Repeat
Pick up the clay, turn it ninety degrees, and set it back down. Again, press down and forward with your palms, rolling the clay toward you. This folding action is what mixes the clay to achieve a uniform consistency.
Step 4: Knowing When You're Done
Repeat this process consistently. The number of repetitions (the reference suggests 50) is just a guideline. You are finished when the clay feels completely uniform. A definitive test is to cut the clay in half with a wire. The cut surfaces should be perfectly smooth, with no visible air pockets or spiraling lines.
Common Pitfalls to Avoid
Proper technique is essential. It is easy to make mistakes that are counterproductive to the goal of preparing your clay.
Pitfall: Trapping More Air
An incorrect folding or rolling motion can actually introduce more air into the clay than you remove. Focus on compressing the clay and avoid folding over large, empty pockets. The motion should be deliberate and firm.
Pitfall: Overworking the Clay
Wedging on a porous surface will gradually dry your clay out. If you work it for too long, it can become too stiff to shape easily. Work efficiently until the clay is uniform, but don't continue indefinitely.
Pitfall: Using the Wrong Surface
Attempting to wedge on a non-porous surface like plastic, a sealed countertop, or a varnished table will cause the clay to stick. This makes the process frustrating and messy, preventing you from developing a good rhythm.
Preparing Your Clay for Your Goal
Your approach to wedging can be tailored slightly depending on what you plan to do next.
- If your primary focus is simple hand-building: Concentrate on getting the clay to a uniform, soft consistency that feels good in your hands.
- If your primary focus is throwing on the wheel: It is absolutely critical to remove all air bubbles and create a perfectly centered, cone-shaped lump.
- If your primary focus is ensuring your work survives the kiln: Always perform the wire-cut test to visually confirm that there are no remaining air pockets before you begin shaping.
This foundational skill of preparing your clay is the bedrock of successful pottery.
Summary Table:
| Key Step | Purpose | Pro Tip |
|---|---|---|
| Wedging | Remove air bubbles, create uniform consistency. | Use a porous surface like canvas or plaster. |
| Wire-Cut Test | Confirm no air pockets remain. | Cut the clay in half; the surface should be smooth. |
| Consistency | Ensure even moisture for workability. | Stop when the clay feels smooth and uniform. |
Ready to bring your pottery projects to life with professional-grade results?
Just as proper clay preparation is the foundation of great pottery, having the right equipment is key to perfect firing. KINTEK specializes in high-quality lab and kiln equipment, trusted by artisans and studios for precise temperature control and reliable performance.
Let us help you equip your studio for success. Contact our experts today to find the perfect kiln for your creative needs!
Visual Guide