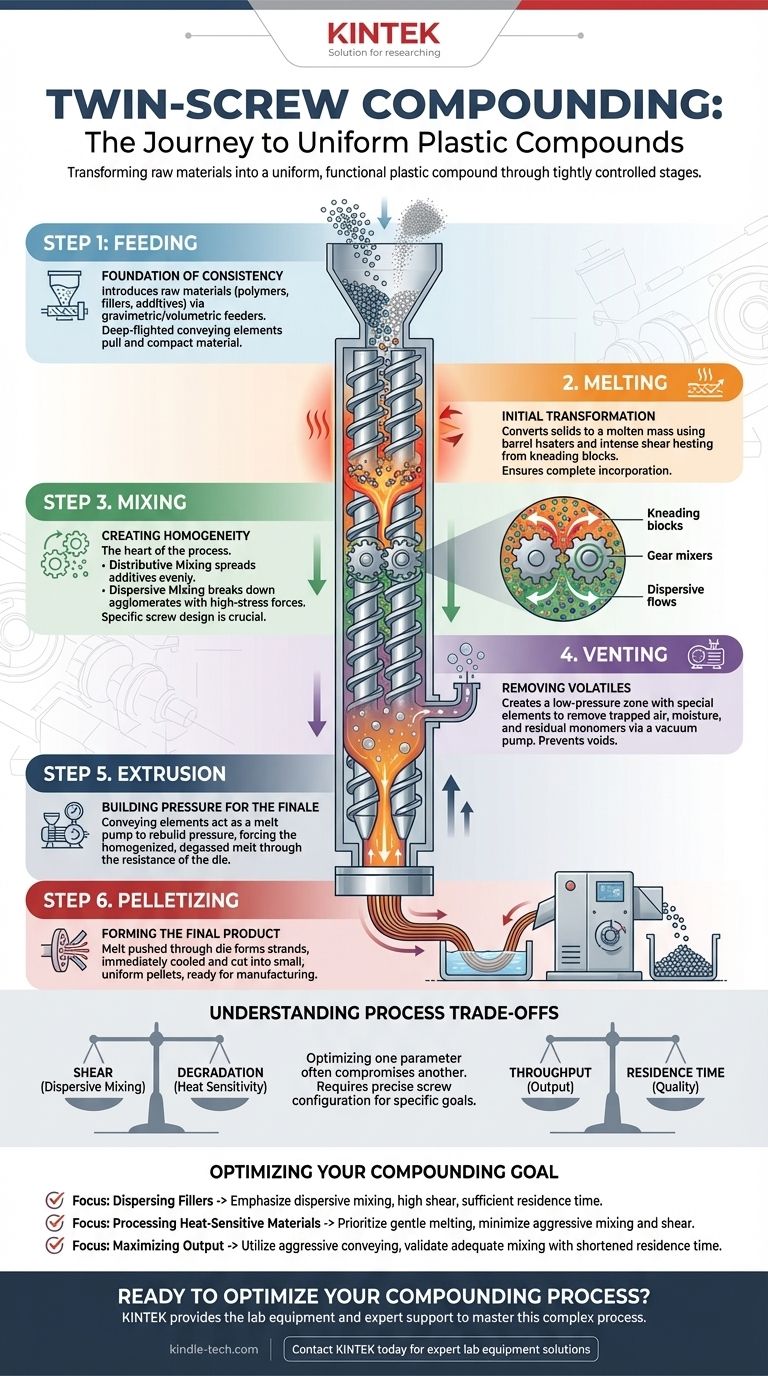
In twin-screw compounding, raw materials are transformed into a uniform, functional plastic compound through a series of tightly controlled stages. The fundamental steps are feeding, melting, conveying, mixing, venting, and finally, extruding the homogenized product. Each stage occurs in a specific zone of the extruder barrel, dictated by the design of the rotating screw elements.
At its core, twin-screw compounding is not just mixing; it is a highly engineered thermodynamic and mechanical process. It uses precisely configured screw elements to control the transformation of raw inputs into a final material with specific, repeatable properties.
A Journey Through the Extruder Barrel
The compounding process can be visualized as a journey that raw materials take from the hopper to the die. Each section of the twin screws is designed to perform a specific task to advance this transformation.
Step 1: Feeding - The Foundation of Consistency
The process begins by introducing raw materials—polymers, fillers, and additives—into the extruder's feed throat. This is typically done with a gravimetric feeder, which doses materials by weight for maximum accuracy, or a volumetric feeder, which doses by volume.
A consistent, steady feed rate is non-negotiable for producing a quality compound. The initial screw elements are designed as deep-flighted conveying sections that pull material from the feed throat and begin compacting it.
Step 2: Melting - The Initial Transformation
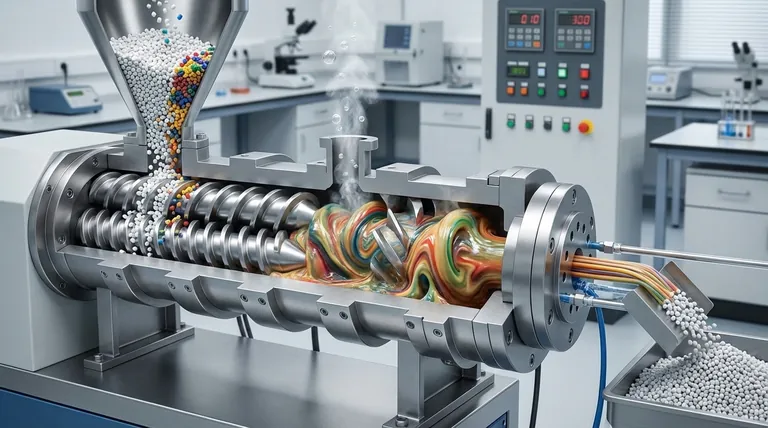
Once conveyed forward, the material enters the melting zone. Melting is achieved through two primary mechanisms: heat conduction from the heated barrel walls and, more importantly, shear heating generated by the mechanical action of the screws.
Kneading blocks or other specialized elements create intense shearing forces, rapidly converting the solid polymer pellets or powder into a molten state. This stage is critical for ensuring all components are incorporated into a single, molten mass.
Step 3: Mixing - Creating Homogeneity
This is the heart of the compounding process. After melting, the material is subjected to intense mixing to ensure all ingredients are distributed evenly. There are two types of mixing:
- Distributive Mixing: This process spreads the additive particles evenly throughout the polymer matrix, like stirring sugar into water. It ensures there are no additive-rich or polymer-rich areas.
- Dispersive Mixing: This process applies high-stress forces to break down agglomerates (clumps) of additives, such as pigments or fillers, into their primary particles. Kneading blocks with tight clearances are excellent for dispersion.
The choice and sequence of mixing elements in the screw design determine the final quality of the compound.
Step 4: Venting - Removing Unwanted Volatiles
Many compounding processes require a venting or devolatilization stage. This section of the extruder is designed with special screw elements that create a low-pressure zone.
This pressure drop allows unwanted volatiles—such as trapped air, moisture, or residual monomers—to be pulled out of the melt stream by a vacuum pump. This step is critical for preventing voids in the final product and improving material properties.
Step 5: Extrusion - Building Pressure for the Finale
After the low-pressure venting zone, the screws must once again build pressure in the melt. This is accomplished with a final set of conveying elements that act as a melt pump.
This pressure is necessary to force the homogenized, degassed molten polymer through the resistance of the final component: the die.
Step 6: Pelletizing - Forming the Final Product
The final step is extrusion, where the pressurized melt is pushed through a die plate, which contains one or many small orifices. This forms continuous strands of plastic, often called "spaghetti."
These strands are immediately cooled, typically in a water bath or with a water spray, and then cut into small pellets by a rotating knife assembly. These pellets are the final, saleable product, ready for use in subsequent manufacturing processes like injection molding or profile extrusion.
Understanding the Trade-offs
The compounding process is a constant balancing act. Optimizing for one parameter often means compromising on another.
Shear vs. Degradation
High shear forces are excellent for dispersive mixing, but they also generate significant heat. For heat-sensitive or shear-sensitive polymers, excessive shear can cause chain scission and degrade the material's molecular weight and physical properties.
Throughput vs. Residence Time
Increasing the screw speed will increase the machine's output (throughput). However, this also reduces the residence time—the amount of time the material spends inside the extruder. Shorter residence times can lead to incomplete melting, poor mixing, or insufficient venting, compromising product quality.
The Importance of Screw Configuration
There is no single "correct" screw design. The arrangement, type, and length of each element (conveying, kneading, mixing) are highly customized for a specific formulation and desired outcome. A design optimized for dispersing carbon black will be fundamentally different from one designed for gently mixing a shear-sensitive biopolymer.
Applying This Knowledge to Your Compounding Goal
Your specific objective dictates how you should prioritize and configure these stages.
- If your primary focus is dispersing difficult fillers: Your process must emphasize the dispersive mixing stage with high-shear kneading blocks and ensure sufficient residence time.
- If your primary focus is processing heat-sensitive materials: Your screw design should prioritize gentle melting and conveying, using less aggressive mixing elements to minimize shear heating and prevent degradation.
- If your primary focus is maximizing output: You will utilize aggressive conveying elements and higher screw speeds, but you must validate that the shortened residence time still allows for adequate mixing and devolatilization to meet quality standards.
Understanding these individual stages transforms you from a machine operator into a process engineer, empowering you to troubleshoot problems and truly control the final properties of your material.
Summary Table:
| Step | Key Function | Key Equipment/Element |
|---|---|---|
| 1. Feeding | Introduce raw materials (polymer, fillers, additives) | Gravimetric/Volumetric Feeder, Conveying Screw Elements |
| 2. Melting | Transform solids into a molten mass via heat and shear | Barrel Heaters, Kneading Blocks |
| 3. Mixing | Distribute and disperse additives evenly for homogeneity | Kneading Blocks, Mixing Elements |
| 4. Venting | Remove unwanted volatiles (air, moisture) | Vent Port, Vacuum Pump |
| 5. Extrusion | Build pressure to push melt through the die | Conveying Screw Elements |
| 6. Pelletizing | Form and cut the melt into uniform pellets | Die Plate, Water Bath, Pelletizer |
Ready to optimize your compounding process and achieve superior material properties?
The precise control offered by twin-screw compounding is key to developing high-performance plastic compounds. At KINTEK, we specialize in providing the lab equipment and expert support you need to master this complex process.
Whether you are dispersing difficult fillers, working with heat-sensitive polymers, or aiming to maximize throughput, our solutions are tailored to meet your specific laboratory challenges. Let us help you configure the right equipment and processes to ensure consistent, high-quality results.
Contact KINTEK today to discuss your compounding goals and discover how our expertise in lab equipment can drive your success.
Visual Guide
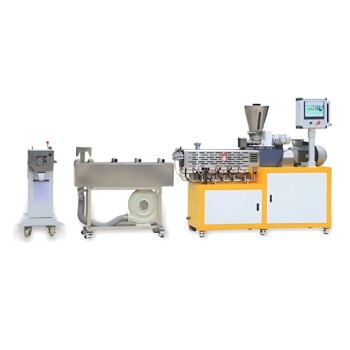
Related Products
- Twin Screw Extruder Plastic Granulation Machine
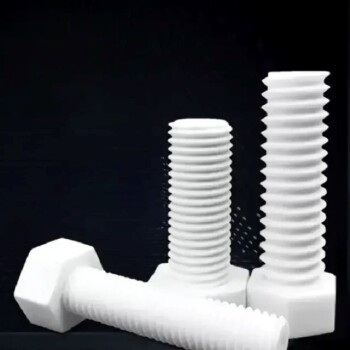
- High Quality Alumina Ceramic Screw for Engineering Advanced Fine Ceramics with High Temperature Resistance and Insulation
People Also Ask
- What is twin screw granulation? A Guide to Modern, Continuous Pharmaceutical Manufacturing
- What is the twin screw extrusion process? A Guide to Advanced Mixing & Compounding
- What is twin screw compounding? The Ultimate Guide to Advanced Polymer Mixing
- What are the advantages of screw extruders? Achieve Efficient, Continuous Polymer Processing
- What are the advantages of twin screw granulation? Achieve Superior Control and Consistency in Manufacturing