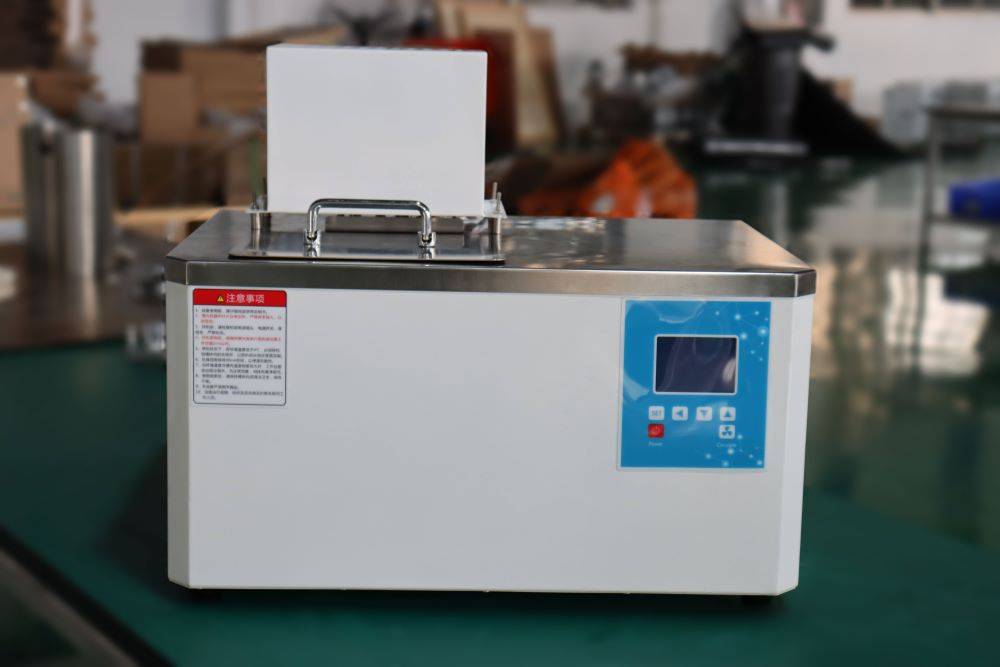
Preparation Before Using the Low-Temperature Thermostatic Reaction Bath
Connecting the Instrument
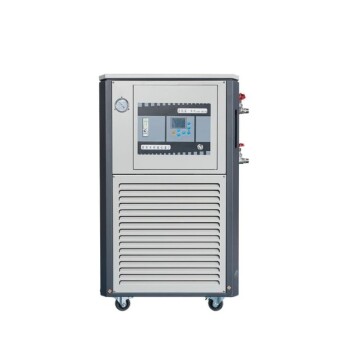
When setting up the low-temperature thermostatic reaction bath, the first step involves connecting the instrument using heat insulation and thermal insulation hoses. These hoses are crucial for maintaining the temperature integrity of the system. Specifically, the inlet and outlet of the reaction bath must be connected to the corresponding ports of the experimental instrument. This ensures that the flow of temperature-controlled medium is seamless and efficient, thereby stabilizing the experimental conditions.
To facilitate this process, it is essential to:
- Align the Ports: Ensure that the inlet and outlet ports of both the reaction bath and the experimental instrument are correctly aligned. Misalignment can lead to leaks and inefficient heat transfer.
- Secure the Connections: Use clamps or other securing mechanisms to ensure that the hoses are tightly connected. This prevents any loose fittings that could cause interruptions in the temperature-controlled medium flow.
- Inspect for Leaks: Before proceeding, check the connections for any signs of leakage. A small leak can significantly impact the temperature control and overall experiment outcome.
By following these steps, you can establish a reliable connection that supports the precise temperature control required for your experiments.
Adding the Temperature Medium
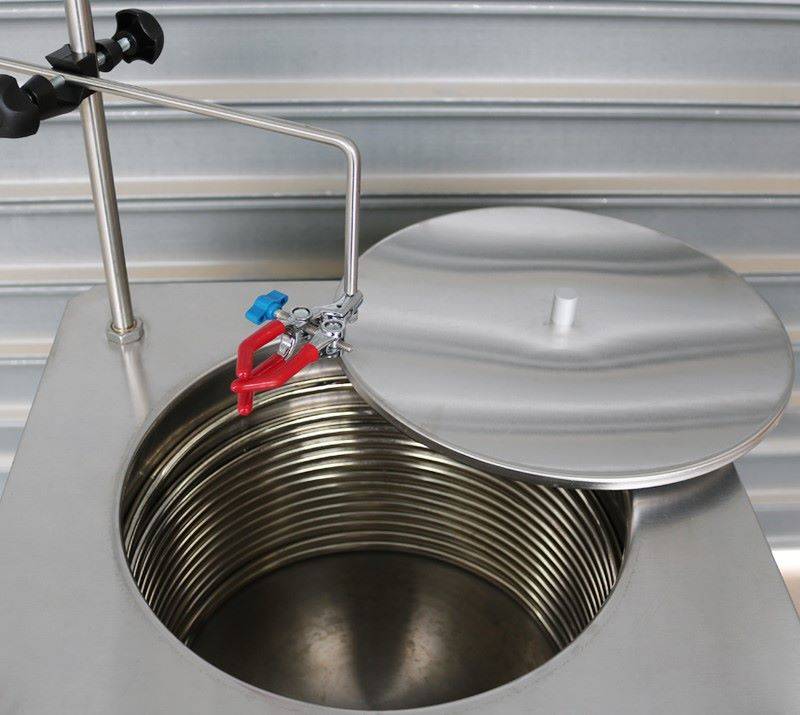
Before adding the temperature medium, it is crucial to ensure that the insulated cover is securely opened. This step is essential to prevent any accidental spillage or damage to the equipment. Once the cover is open, proceed to the sink port, where you will introduce the water or other temperature medium into the system.
When filling the tank, it is important to monitor the liquid level closely. The liquid should not exceed the coils within the tank. Overfilling can lead to inefficient heat transfer and potential damage to the internal components. To avoid this, use a clear and calibrated container to measure the exact amount of liquid needed.
Additionally, the choice of temperature medium should align with the specific requirements of your experiment. Common choices include water, antifreeze solutions, or specialized coolants, each with its own thermal properties and compatibility with the reaction bath. Always refer to the manufacturer's guidelines for the recommended temperature medium and fill levels.
By following these steps carefully, you ensure that the low-temperature thermostatic reaction bath is properly prepared with the appropriate temperature medium, setting the stage for accurate and reliable experimental outcomes.
Connecting the Power Supply
When connecting the power supply to the low-temperature thermostatic reaction bath, safety is paramount. Begin by ensuring that the safety switch is in the "off" position before you plug the device into an outlet. This precautionary measure is crucial to prevent any accidental activation of the equipment while you are making connections.
The outlet you use must be equipped with a reliable ground wire. A grounded outlet provides an essential safety feature by diverting any electrical faults to the ground, thereby protecting both the user and the equipment from potential damage. It is also advisable to check the condition of the power cord and the outlet itself to ensure there are no frayed wires or other hazards that could compromise safety.
To summarize, the process of connecting the power supply involves:
- Turning Off the Safety Switch: Ensure the safety switch is off to prevent accidental operation during connection.
- Using a Grounded Outlet: Plug the device into an outlet with a reliable ground wire to ensure electrical safety.
- Checking for Hazards: Inspect the power cord and outlet for any signs of wear or damage that could pose a risk.
By following these steps, you can safely connect the power supply and prepare the low-temperature thermostatic reaction bath for use.
Operation Instructions During Use
Starting the Instrument
To initiate the operation of the low-temperature thermostatic reaction bath, begin by engaging the leakage protection switch and the main power switch. This step is crucial to ensure the safety and functionality of the instrument.
Next, set the desired experimental temperature. This can be done through the control panel, which allows for precise adjustments to meet the specific requirements of your experiment.
Finally, activate the refrigeration and circulation switches. These switches are essential for maintaining the set temperature and ensuring efficient heat transfer throughout the experiment. By following these steps, you ensure that the instrument is properly set up to perform optimally.
Stirring During the Experiment
When conducting experiments with a low-temperature thermostatic reaction bath, proper stirring is crucial for maintaining uniformity and efficiency. If stirring is necessary for your specific experiment, follow these steps to ensure optimal results:
-
Activate the Stirring Mechanism: Begin by turning on the stirring switch located on the control panel. This action initiates the magnetic stirrer, which will agitate the solution within the reaction bath.
-
Position the Magnetic Stirrer: Carefully place the magnetic stirrer in the appropriate location within the reaction bath. The stirrer should be positioned such that it can effectively mix the contents without causing excessive turbulence or spillage.
-
Adjust Stirring Speed: Fine-tune the stirring speed to match the requirements of your experiment. This can typically be done using a speed control dial or digital interface. Ensure that the speed is set to a level that provides adequate mixing without compromising the integrity of the experiment.
By following these steps, you can ensure that the stirring process during your experiment is both effective and efficient, contributing to the overall success of your research.
Finishing Work After Use
Shutting Down the Instrument
To ensure the safe and proper shutdown of the low-temperature thermostatic reaction bath, follow these steps in sequence:
-
Turn Off the Instrument: Begin by deactivating the main instrument that requires cooling. This step is crucial to prevent any residual heat from causing damage or instability in the system.
-
Circulating Pump: Next, switch off the circulating pump. This ensures that no further coolant is circulated through the system, allowing the remaining coolant to stabilize and cool down.
-
Stirring Mechanism: If the stirring mechanism was in use, turn it off at this stage. This prevents unnecessary wear and tear on the stirring components and ensures that the system is fully at rest.
-
Refrigeration System: Subsequently, turn off the refrigeration system. This step allows the system to gradually return to ambient temperature without the risk of sudden thermal shocks.
-
Power Switches: After ensuring that all operational components are deactivated, turn off the main power switches. This step is essential for overall safety and to prevent any accidental reactivation of the system.
-
Safety Switch and Power Supply: Finally, unplug the safety switch and power supply. This final step ensures that there is no residual electrical connection, thereby eliminating any potential risks of electrical hazards.
By following these steps meticulously, you ensure a safe and efficient shutdown process, protecting both the instrument and the user from any potential harm.

Long-Term Storage
When planning to store the low-temperature thermostatic reaction bath for an extended period, it is crucial to prepare the instrument properly to prevent damage and ensure its longevity. The first step involves draining the coolant from the system. This process is essential to prevent the coolant from degrading or freezing, which could lead to potential damage to the internal components.
Once the coolant is fully drained, the next critical step is to rinse the bath with water. This helps to remove any residual coolant or contaminants that may have accumulated during the last use. Rinsing with water also ensures that the internal surfaces of the bath are clean and free from any corrosive elements that could cause long-term damage.
It is advisable to perform these steps thoroughly to maintain the integrity and performance of the instrument. Proper long-term storage not only preserves the functionality of the bath but also extends its operational life, making it ready for use whenever the need arises.
Related Products
- 10L Chilling Circulator Cooling Water Bath Low Temperature Constant Temperature Reaction Bath
- 30L Chiller Water Bath Cooling Circulator Low Temperature Constant Temperature Reaction Bath
- 5L Chilling Circulator Cooling Water Bath Circulator for Low Temperature Constant Temperature Reaction Bath
- 80L Chilling Circulator Cooling Water Circulator for Water Bath Cooling and Low Temperature Constant Temperature Reaction Bath
- 20L Chiller Water Bath Cooling Circulator Low Temperature Constant Temperature Reaction Bath
Related Articles
- Molecular Distillation: An Efficient Separation and Purification Technology
- Molecular Distillation Techniques in Chinese and Western Pharmacology
- Constant Temperature Water Bath: Use, Maintenance, and Operation
- Manufacturing Sputtering Targets Using Powder Metallurgy
- Types of Bias Power Supplies in Magnetron Sputtering and Their Purposes