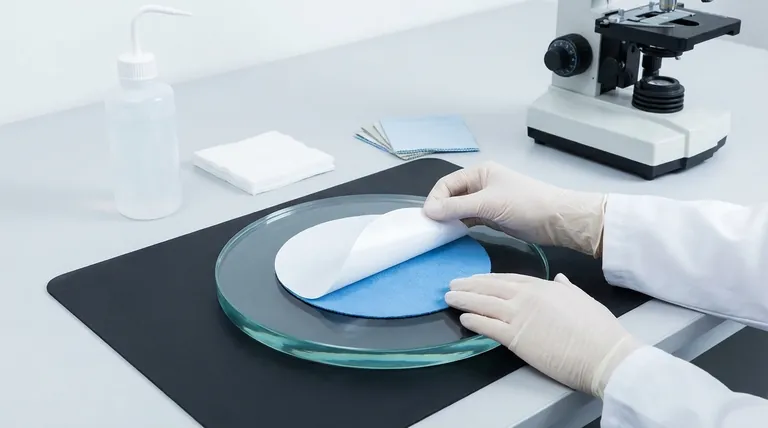
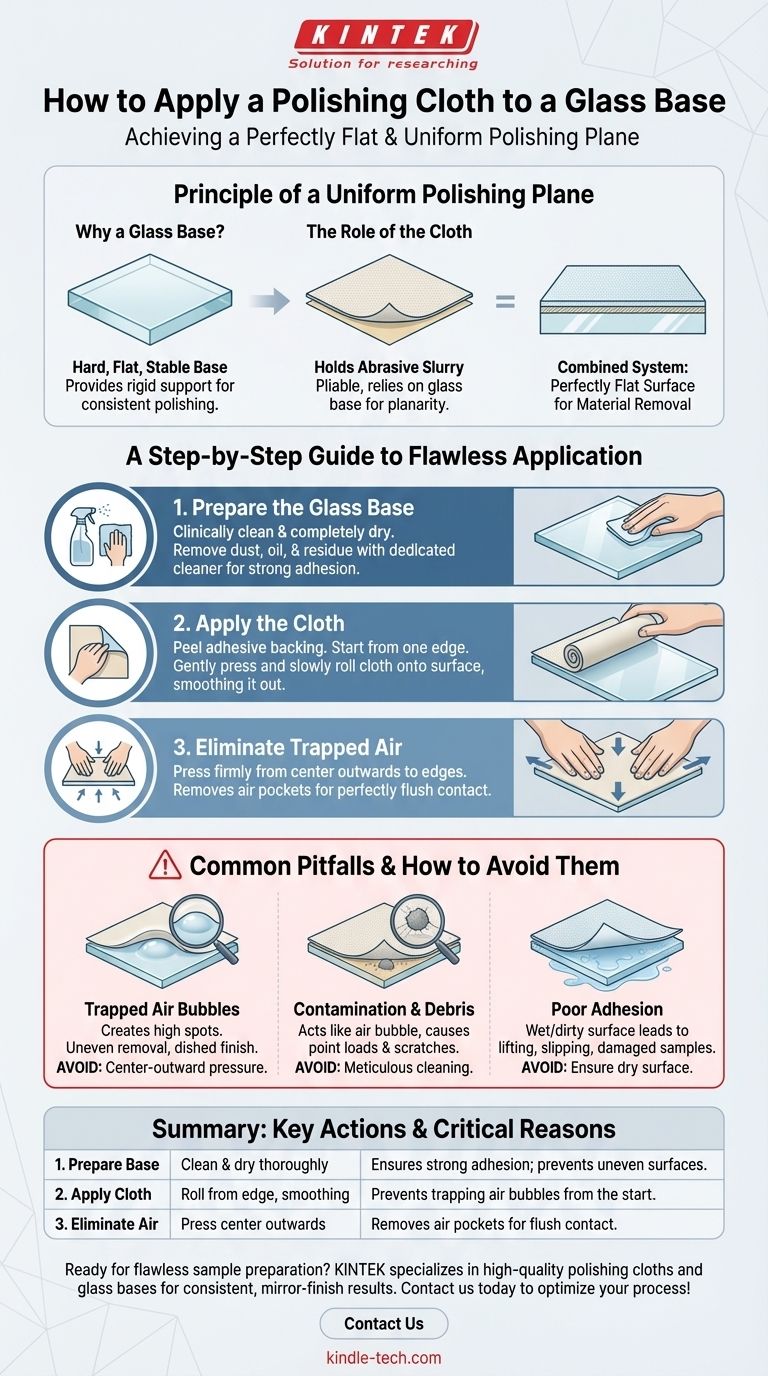
Applying a polishing cloth to a glass base is a straightforward process centered on precision. You must begin with a perfectly clean and dry glass base. Then, peel the protective paper from the adhesive backing of the cloth and carefully press it onto the glass, ensuring firm, even contact and eliminating any trapped air bubbles.
The objective is not merely to stick the cloth to the base, but to create a perfectly flat and uniform polishing plane. Any imperfection in the application, such as a trapped air bubble or piece of debris, will compromise the entire polishing process and damage your workpiece.
The Principle of a Uniform Polishing Plane
To achieve a high-quality polish, you must understand why each step in the preparation is critical. The entire system is designed to create a perfectly flat surface for material removal.
Why a Glass Base?
A glass base is used because it is exceptionally hard, flat, and stable. It acts as the ideal foundation, providing the rigid support necessary for a consistent and uniform polish across your entire sample.
The Role of the Cloth
The polishing cloth holds the abrasive slurry, but it relies on the glass base beneath it for its planarity. The cloth itself is pliable; the glass ensures that the polishing action is perfectly level.
A Step-by-Step Guide to Flawless Application
Following a precise method prevents the most common errors and ensures a reliable polishing surface every time.
Step 1: Prepare the Glass Base
The base must be clinically clean and completely dry. Any dust, oil, or residual moisture will prevent proper adhesion and create an uneven surface.
For stubborn stains or old adhesive, use a dedicated glass cleaner and ensure all residue is removed before proceeding.
Step 2: Apply the Cloth
Peel the protective backing paper off the new cloth. To prevent trapping air, it is best to start from one edge.
Align the edge of the cloth with the edge of the glass base. Gently press it down and slowly roll the rest of the cloth onto the surface, smoothing it out as you go. This technique is similar to applying a screen protector to a phone.
Step 3: Eliminate Trapped Air
Once the cloth is in place, press down firmly across the entire surface. Work from the center of the cloth outwards to the edges.
This methodical pressure pushes any small, trapped air pockets toward the edge and out from under the cloth, ensuring a perfectly flush contact between the cloth and the glass.
Common Pitfalls and How to Avoid Them
Success lies in avoiding small mistakes that have major consequences. An improperly applied cloth will actively work against your goal of a perfect finish.
Trapped Air Bubbles
This is the most common failure. An air bubble creates a "high spot" on the polishing surface. This spot will apply more pressure than the surrounding area, leading to uneven material removal and a "dished" or wavy finish on your sample.
Contamination and Debris
If a speck of dust or a stray fiber is trapped between the cloth and the glass, it will function just like an air bubble. Worse, a hard particle can create a point load that causes deep, unintentional scratches in your workpiece.
Poor Adhesion
Applying a cloth to a wet or dirty surface will lead to weak adhesion. The cloth may begin to lift or slip at the edges during the polishing process, ruining the planarity and potentially catching and damaging your sample.
Making the Right Choice for Your Goal
Your preparation of the polishing surface is as important as the polishing itself. The quality of your setup dictates the quality of your result.
- If your primary focus is initial setup: Meticulously clean the glass base and use a center-outward pressure technique to guarantee a bubble-free application.
- If your primary focus is achieving a mirror finish: Double-check the cleanliness of your environment to prevent any airborne dust from contaminating the adhesive or surface during application.
- If your primary focus is long-term consistency: Before applying a new cloth, always inspect the glass base for any minor scratches or damage that could compromise its flatness.
A meticulously prepared polishing base is the non-negotiable foundation of any successful polishing operation.
Summary Table:
| Step | Key Action | Why It's Critical |
|---|---|---|
| 1. Prepare Base | Clean & dry glass base thoroughly | Ensures strong adhesion; prevents uneven surfaces |
| 2. Apply Cloth | Roll cloth from one edge, smoothing as you go | Prevents trapping air bubbles from the start |
| 3. Eliminate Air | Press firmly from center outwards | Removes air pockets for a perfectly flush contact |
| Common Pitfalls | Trapped air, debris, poor adhesion | Causes uneven polishing, dishing, and sample damage |
Ready to achieve flawless sample preparation every time?
The foundation of a perfect polish is a perfectly prepared surface. KINTEK specializes in high-quality lab equipment and consumables, including the reliable polishing cloths and stable glass bases you need for consistent, mirror-finish results.
Let our experts help you optimize your polishing process.
Contact us today to find the right solutions for your laboratory's precision needs!
Visual Guide
Related Products
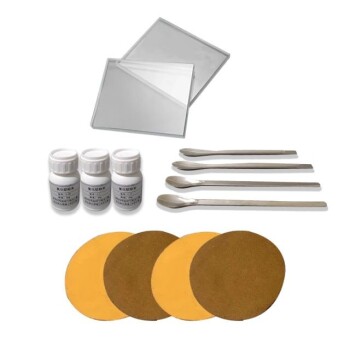
- Electrode Polishing Material for Electrochemical Experiments
- Professional Cutting Tools for Carbon Paper Cloth Diaphragm Copper Aluminum Foil and More
People Also Ask
- What is the mechanism and purpose of using fine sandpaper for electrode grinding? Restore Peak Electrode Performance
- What are the electrode materials? A Guide to Choosing the Right Conductor for Your Application
- What is the correct technique for polishing an electrode? Master the Steps for Reliable Electrochemical Data
- How is a polished electrode tested for quality? Validate Performance with Cyclic Voltammetry
- What is the general procedure and what precautions should be taken during the polishing process? Achieve a Flawless Electrode Finish