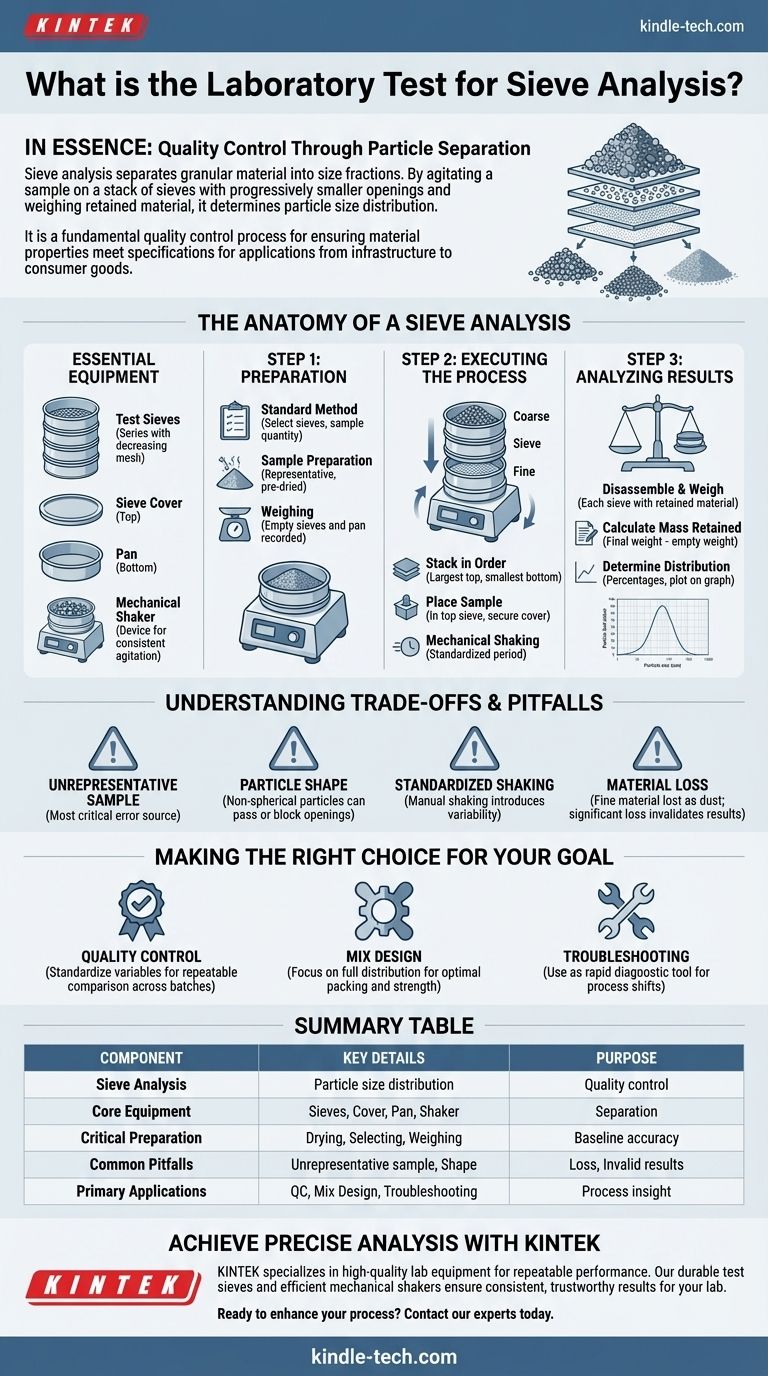
In essence, a laboratory sieve analysis is a straightforward procedure for separating a granular material into different size fractions. It involves agitating a pre-weighed sample on a stack of sieves with progressively smaller mesh openings and then weighing the amount of material retained on each sieve to determine the particle size distribution.
Sieve analysis is more than just a sorting method; it is a fundamental quality control process. It provides the critical data needed to verify that a material's physical properties meet the precise specifications required for its intended application, from building stable infrastructure to producing consistent consumer goods.
The Anatomy of a Sieve Analysis
To perform this test correctly, you must understand the equipment, preparation, and execution with precision. Each step is designed to ensure the final results are both accurate and repeatable.
The Essential Equipment
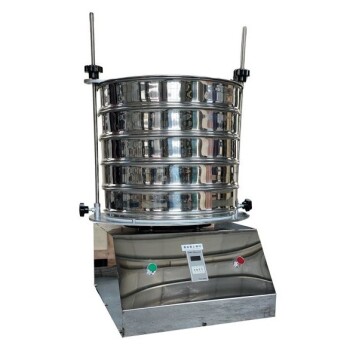
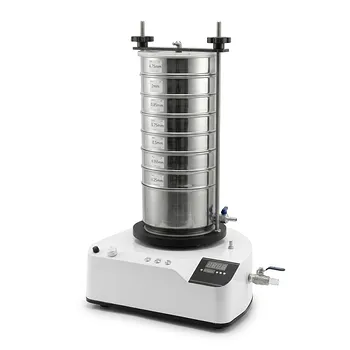
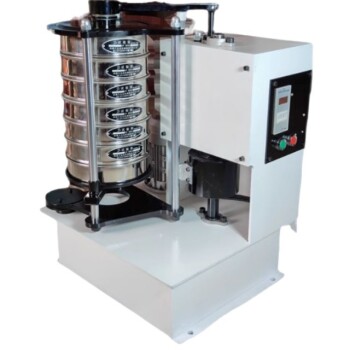
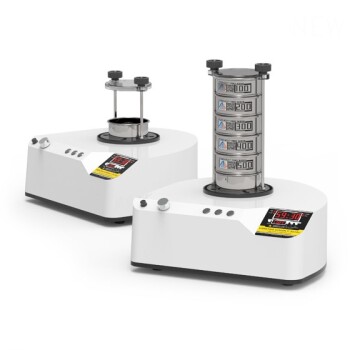
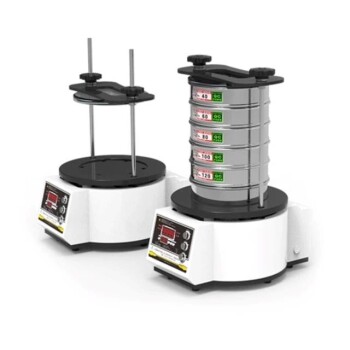
The core of the test is the test sieve, a circular metal frame holding a woven wire mesh with precisely sized square openings. These are stacked together to form a sieve stack.
A complete setup includes:
- Test Sieves: A series of sieves with decreasing mesh opening sizes, from coarse to fine.
- Sieve Cover: Placed on the top sieve to prevent material loss during shaking.
- Pan: A solid pan placed at the bottom of the stack to collect the finest particles.
- Mechanical Shaker: A device that agitates the entire sieve stack with a consistent, repeatable motion to facilitate particle separation.
Step 1: Preparation for an Accurate Test
The reliability of your results is determined before you ever start shaking. Rigorous preparation is non-negotiable.
First, you must develop a standard method. This involves selecting the appropriate sieve sizes for your material and determining the required sample quantity.
Next is sample preparation. The sample must be representative of the entire batch of material. It may need to be pre-dried in an oven to remove moisture, which can cause particles to clump together and skew the results.
Finally, each individual sieve and the bottom pan must be weighed while empty and their weights recorded. This provides the baseline for your final calculations.
Step 2: Executing the Sieving Process
With preparation complete, the test itself is methodical. The sieves are stacked in order of mesh size, with the largest opening on top and the smallest opening on the bottom, just above the collection pan.
The pre-weighed material sample is carefully placed into the top sieve, and the cover is secured.
The entire stack is placed on the mechanical shaker and agitated for a standardized period. This motion allows smaller particles to fall through the mesh until they are retained by a sieve they cannot pass or collect in the bottom pan.
Step 3: Analyzing the Results
Once shaking is complete, the analysis begins. The stack is disassembled, and each sieve is weighed individually with its retained material.
The initial empty weight of each sieve is subtracted from its final weight to determine the mass of the material retained on that specific sieve.
These weights are then converted into percentages of the total initial sample weight. This data creates a particle size distribution, often plotted on a graph, which gives a clear visual representation of the material's gradation.
Understanding the Trade-offs and Common Pitfalls
While widely used, sieve analysis has limitations that every practitioner must recognize to avoid misinterpreting the results.
The Risk of an Unrepresentative Sample
The most critical error source occurs before the test even begins. If the small sample taken for analysis does not accurately reflect the bulk material, the results are meaningless, no matter how carefully the test is performed.
Issues with Particle Shape
Sieve analysis inherently assumes particles are roughly spherical. Elongated or flat particles can either pass through openings end-on that they would otherwise be retained by, or they can block the mesh openings, preventing smaller particles from passing through.
The Importance of Standardized Shaking
For quality control and comparability, the sieving action must be consistent. Using a mechanical shaker with a set time and intensity is crucial. Manual shaking introduces variability and is not suitable for most professional applications.
Inevitable Loss of Material
During handling and shaking, it is common to lose a small amount of fine material as airborne dust. The total weight of the retained fractions should be compared to the initial sample weight. If the loss is significant (typically over 1-2%), the test results may be considered invalid.
Making the Right Choice for Your Goal
Sieve analysis is a versatile tool, but how you use the data depends entirely on your objective.
- If your primary focus is material acceptance and quality control: Standardize every variable—sample weight, shaking time, and sieve stack—to ensure your results are repeatable and can be reliably compared across different batches.
- If your primary focus is designing an aggregate mix for concrete or asphalt: Concentrate on the full particle size distribution curve to ensure the material gradation provides the optimal packing density for strength and workability.
- If your primary focus is troubleshooting a production process: Use sieve analysis as a rapid diagnostic tool to identify shifts in particle size that point to upstream equipment malfunction or changes in raw materials.
Ultimately, this simple test transforms a pile of granular material into actionable data, providing the foundational insight required for sound engineering and manufacturing decisions.
Summary Table:
| Sieve Analysis Component | Key Details |
|---|---|
| Purpose | Determines particle size distribution of a granular material. |
| Core Equipment | Test sieves, cover, pan, and a mechanical sieve shaker. |
| Critical Preparation | Sample drying, selecting correct sieves, and weighing empty sieves. |
| Common Pitfalls | Unrepresentative sample, non-spherical particles, and material loss. |
| Primary Applications | Quality control, aggregate mix design, and production troubleshooting. |
Achieve precise and reliable particle size analysis in your lab.
Accurate sieve analysis is the foundation of quality control for countless materials, from construction aggregates to pharmaceutical powders. The right equipment ensures your results are consistent and trustworthy.
KINTEK specializes in high-quality lab equipment and consumables, including durable test sieves and efficient mechanical sieve shakers designed for repeatable performance. Our products help laboratories like yours maintain strict standards and make confident decisions based on accurate data.
Ready to enhance your sieving process? Contact our experts today to find the perfect solution for your laboratory's specific needs.
Visual Guide
Related Products
- Laboratory Test Sieves and Vibratory Sieve Shaker Machine
- Laboratory Test Sieves and Sieving Machines
- Laboratory Vibratory Sieve Shaker Machine for Dry and Wet Three-Dimensional Sieving
- Laboratory Vibratory Sieve Shaker Machine Slap Vibrating Sieve
- Three-dimensional electromagnetic sieving instrument
People Also Ask
- What is the function of a vibratory sieve shaker? Achieve Precise Particle Size Analysis
- What is the principle of vibratory sieve shaker? Achieve Accurate Particle Size Analysis
- How is a vibratory sieve shaker used in the particle size analysis of mechanically alloyed powders? Expert Guide
- What is the use of vibratory sieve shaker? Achieve Precise Particle Size Analysis for Your Lab
- How do you use a sieve shaker? Master Particle Size Analysis for Quality Control