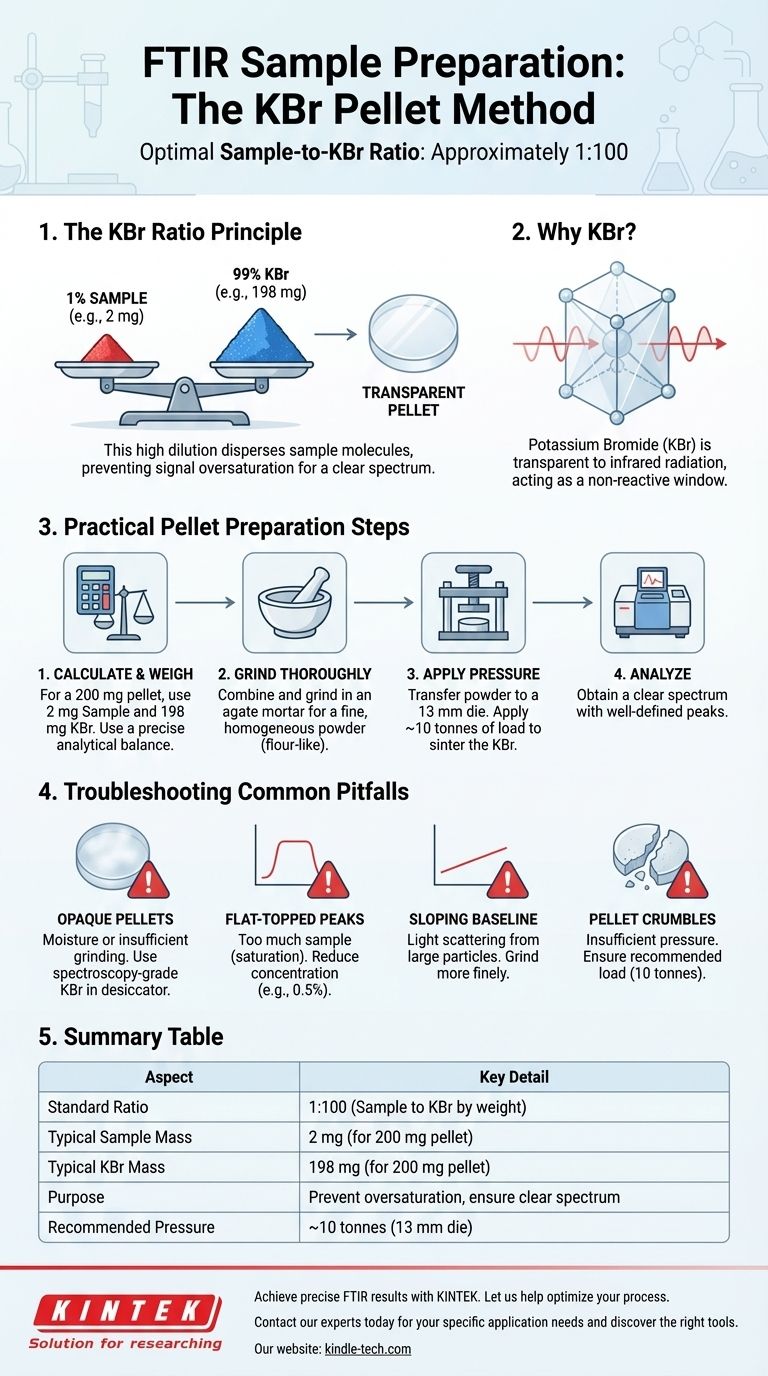
The standard ratio for sample to potassium bromide (KBr) in FTIR analysis is approximately 1:100. This means your sample should constitute about 1% of the total mixture by weight, with the remaining 99% being KBr. This high level of dilution is essential for preparing a transparent pellet that allows infrared light to pass through, enabling you to obtain a clear and interpretable spectrum.
The 1:100 sample-to-KBr ratio is a carefully balanced compromise. Its purpose is to disperse the sample molecules evenly throughout an infrared-transparent matrix, preventing oversaturation of the signal while ensuring enough analyte is present for a strong, clear spectrum.
The Principle Behind the KBr Pellet Method
Understanding why this specific preparation method is used is key to mastering the technique and troubleshooting your results. The goal is not just to get the sample into the spectrometer, but to do so in a way that produces accurate data.
Why Potassium Bromide?
The choice of KBr is deliberate. It is a salt that is transparent to infrared radiation across a wide range of frequencies. This means it doesn't absorb the light itself and won't contribute interfering peaks to your spectrum. It effectively serves as a solid, non-reactive "window" through which your sample can be analyzed.
The Goal of Dilution
If a sample is too concentrated, its strongest absorption bands will absorb all the infrared light at those frequencies. This phenomenon, known as total absorption, causes the peaks to appear "flat-topped." When a peak is flat, you lose all quantitative information and distort the true shape of the spectral band.
The 1:100 dilution spreads the sample molecules far apart, ensuring that even at the strongest absorption frequencies, some light can still pass through to the detector.
Achieving a Homogeneous Mixture
The ratio is only effective if the sample is uniformly dispersed within the KBr. If the sample is clumped together, you will get a poor-quality spectrum with a sloping baseline and distorted peaks. Thorough grinding is necessary to reduce particle size and mix the components into a homogenous powder.
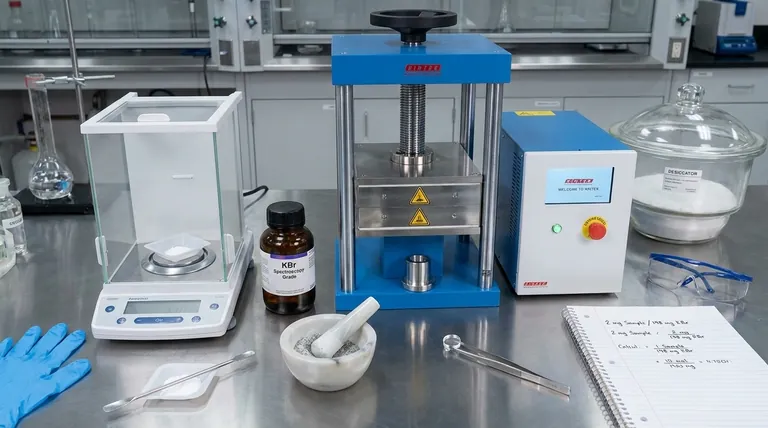
Practical Steps for Pellet Preparation
Following a consistent procedure is critical for creating high-quality, reproducible pellets. For a standard 13 mm (or 1/2 inch) die, the process is straightforward.
Calculating the Mass
First, determine the total mass of the pellet. A common target is 200-250 mg of the total mixture.
Using the 1:100 ratio, a 200 mg pellet would require 2 mg of sample and 198 mg of KBr. Using a precise analytical balance is crucial for this step.
The Grinding Process
Combine the weighed sample and KBr in an agate mortar and pestle. Grind the mixture thoroughly for several minutes. The goal is a fine, consistent powder that looks like flour. This step reduces particle size to minimize light scattering and ensures the sample is evenly distributed.
Applying Pressure
Transfer the ground powder to your pellet die. A typical "rule of thumb" for a 13 mm die is to apply a load of around 10 tonnes using a hydraulic press. This immense pressure sinters the KBr powder, forming a solid, often translucent disc suitable for analysis.
Common Pitfalls and Troubleshooting
Even with the correct ratio, several issues can arise during pellet preparation. Understanding the symptoms can help you diagnose the problem quickly.
Symptom: Opaque or Cloudy Pellets
This is most often caused by moisture contamination. KBr is highly hygroscopic (it readily absorbs water from the air). Always use spectroscopy-grade KBr that has been stored in a desiccator or drying oven. Insufficient grinding can also contribute to a cloudy appearance.
Symptom: "Flat-Topped" Peaks
This is the classic sign of too much sample. The detector is completely saturated at those frequencies. The only solution is to remake the pellet with a lower sample concentration (e.g., 0.5% or less).
Symptom: Sloping Baseline
A sloping baseline is typically caused by light scattering off large particles (known as the Christiansen effect). This indicates that the sample was not ground finely or evenly enough. More thorough grinding is required to fix this.
Symptom: Pellet Crumbles Easily
A fragile pellet usually means insufficient pressure was applied during the pressing stage. Ensure you are reaching the recommended load for your die size. Overly coarse powder can also fail to compact properly.
Making the Right Choice for Your Analysis
While 1:100 is the standard, slight adjustments may be necessary depending on the nature of your sample and your analytical goals.
- If your primary focus is routine qualitative analysis: Start with the 1:100 ratio (e.g., 2 mg sample to 198 mg KBr) as your reliable baseline.
- If you observe very weak spectral signals: You can cautiously increase the sample concentration to 2%, but be vigilant for any signs of peak saturation on your strongest bands.
- If you see "flat-topped" or overly intense peaks: Your sample is too concentrated. Immediately reduce the concentration back to 1% or even lower (0.5%) for highly absorbing materials.
Mastering the KBr pellet technique is about achieving a uniform, microscopic dispersion of your sample within a clear, inert matrix.
Summary Table:
| Aspect | Key Detail |
|---|---|
| Standard Ratio | 1 part sample to 100 parts KBr (by weight) |
| Typical Sample Mass | 2 mg for a 200 mg total pellet |
| Typical KBr Mass | 198 mg for a 200 mg total pellet |
| Purpose of Dilution | Prevents signal oversaturation for clear, interpretable spectra |
| Recommended Pressure | ~10 tonnes for a 13 mm pellet die |
Achieve precise and reliable FTIR results with KINTEK.
Mastering the KBr pellet technique is essential for accurate material analysis. KINTEK specializes in providing the high-quality laboratory equipment and consumables—including precise analytical balances, durable pellet dies, spectroscopy-grade KBr, and reliable hydraulic presses—that your lab needs for consistent success.
Let us help you optimize your FTIR preparation process. Contact our experts today to discuss your specific application requirements and discover the right tools for your laboratory.
Visual Guide
Related Products
- XRF & KBR steel ring lab Powder Pellet Pressing Mold for FTIR
- Laboratory Hydraulic Pellet Press for XRF KBR FTIR Lab Applications
People Also Ask
- How does the selection of a pressure mold affect the performance of all-solid-state batteries? Expert Pelletizing Guide
- What is the primary function of a powder pellet press in the preparation of fillers? Achieve Superior Ceramic Joining
- What is the purpose of using a mold for pellet pressing when preparing catalyst test samples? Ensure Data Consistency
- What are the different types of XRF samples? A Guide to Solid, Powder, and Liquid Prep
- What are the advantages of using the pressed pellet method for XRF sample preparation? Optimize Your XRF Analysis

