At its core, an injection mold is constructed using either a two-plate or a three-plate system. The choice between these two fundamental designs is not arbitrary; it is dictated by the part's geometry, the required gate location, and the desired level of automation in the manufacturing process.
The number of plates in a mold—typically two or three—directly determines how the plastic is delivered and how the final part is separated from its manufacturing scrap. This choice has significant downstream consequences for cost, cycle time, and part quality.
The Basic Anatomy of an Injection Mold
Before comparing designs, it's essential to understand the two halves of any mold. These are often called the A-side and B-side.
The A-Side (Cavity Side)
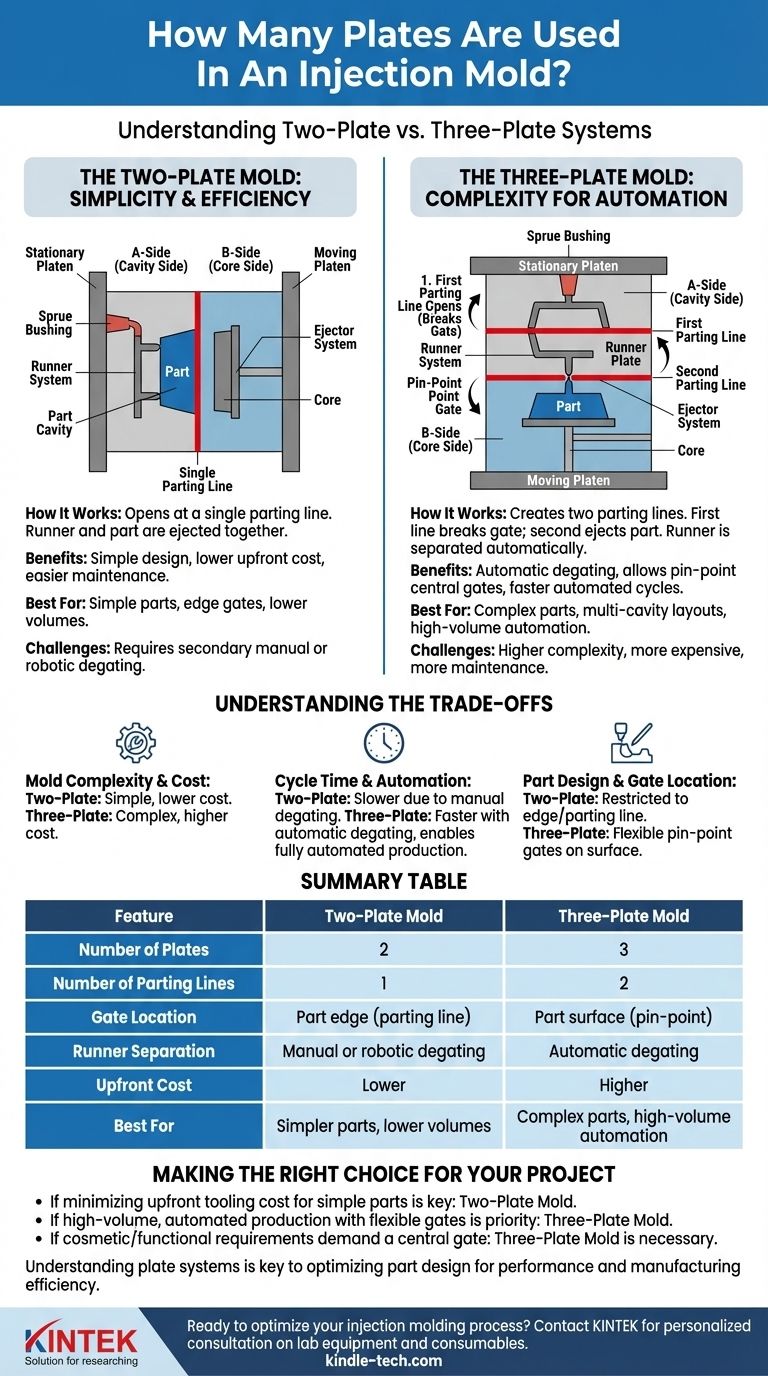
The A-side is the half of the mold that typically attaches to the stationary platen of the injection molding machine. It contains the sprue bushing where plastic first enters the mold and often forms the cosmetic "show surface" of the part.
The B-Side (Core Side)
The B-side attaches to the moving platen and contains the core of the mold, which forms the internal geometry of the part. It also houses the ejector system, which pushes the finished part out of the mold after it has cooled. The separation between the A-side and B-side is called the parting line.
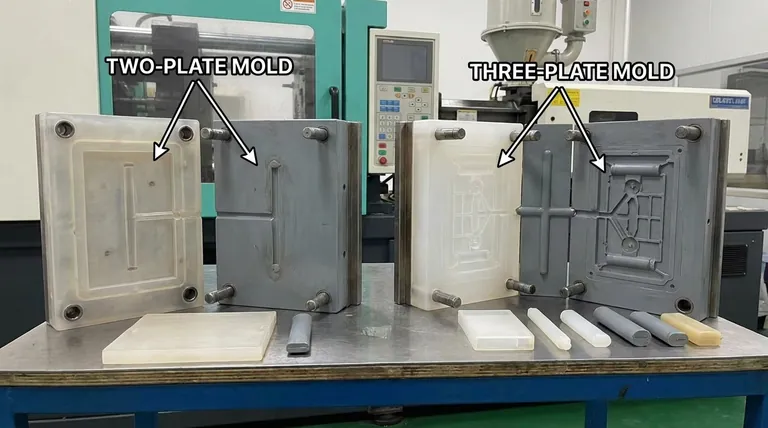
The Two-Plate Mold: Simplicity and Efficiency
A two-plate mold is the most common and straightforward type of injection mold design.
How It Works
This design consists of a single A-side plate system and a single B-side plate system. When the mold opens, it separates at a single parting line.
The Runner System
In a two-plate mold, the runner (the channel that delivers plastic from the sprue to the part cavity) is on the same parting line as the part itself.
This means that when the part is ejected, the runner and sprue are ejected along with it, all connected in a single piece. This requires a secondary operation—either manual or robotic—to separate the part from the runner scrap.
Best Use Cases
Two-plate molds are ideal for simpler parts where the gate mark can be located on the part's outer edge or perimeter. They are less expensive to build and maintain, making them the default choice for a wide range of products.
The Three-Plate Mold: Complexity for Automation
A three-plate mold introduces an additional plate to solve the limitations of the two-plate design.
How It Works
This design uses three plate groups that create two parting lines. It includes the standard A-side and B-side, plus a "runner plate" in between.
As the mold opens, the first parting line opens to break the gate connection to the part. The second parting line then opens to eject the part itself.
The Advantage: Automatic Degating
The primary function of a three-plate mold is automatic degating. The runner system is on a different parting line than the part.
When the mold opens, the runner is held on its plate and separated from the part automatically. The runner is then ejected separately, leaving a clean part that does not require a secondary trimming operation.
Best Use Cases
Three-plate molds are necessary for parts that require a pin-point gate in the middle of a surface, away from the edge. They are also used for complex, multi-cavity layouts where automated runner separation is critical for reducing cycle time and labor costs.
Understanding the Trade-offs
The decision between a two-plate and a three-plate mold involves a direct trade-off between upfront cost and operational efficiency.
Mold Complexity and Cost
A two-plate mold is mechanically simple. It has fewer components, is easier to design and build, and therefore has a significantly lower upfront cost.
A three-plate mold is more complex, requiring more precision machining and assembly. This makes it more expensive to manufacture and maintain.
Cycle Time and Automation
For a two-plate mold, the overall cycle time must include the secondary step of separating the part from the runner. This can increase labor costs and slow down the total production rate.
While the three-plate mold's movement is more complex, it eliminates the need for manual degating. This can lead to a faster, fully automated, and more consistent overall cycle, which is highly valuable in large-scale production.
Part Design and Gate Location
The choice of mold design directly impacts part design. A two-plate mold restricts gate locations to the parting line, leaving a visible mark on the part's edge.
A three-plate mold allows for much greater gating flexibility, enabling pin-point gates on the top surface of a part. This is often crucial for cosmetic reasons or for ensuring proper plastic flow in complex geometries.
Making the Right Choice for Your Project
Your project's specific goals will determine the correct mold design.
- If your primary focus is minimizing upfront tooling cost for simple parts: A two-plate mold is almost always the most economical and effective solution.
- If your primary focus is high-volume, automated production with flexible gate locations: The higher initial investment in a three-plate mold will pay off through lower labor costs and faster cycle times.
- If your part's cosmetic or functional requirements demand a central gate: A three-plate mold is not just an option, but a necessity for the design.
Ultimately, understanding the function of the plate system is the first step toward designing a part that is optimized for both performance and manufacturing efficiency.
Summary Table:
| Feature | Two-Plate Mold | Three-Plate Mold |
|---|---|---|
| Number of Plates | 2 | 3 |
| Number of Parting Lines | 1 | 2 |
| Gate Location | Part edge (parting line) | Part surface (pin-point) |
| Runner Separation | Manual or robotic degating | Automatic degating |
| Upfront Cost | Lower | Higher |
| Best For | Simpler parts, lower volumes | Complex parts, high-volume automation |
Ready to optimize your injection molding process? The right mold design is critical for part quality, cost-efficiency, and production speed. At KINTEK, we specialize in providing the lab equipment and consumables that support advanced manufacturing R&D and quality control. Whether you're prototyping a new part or scaling up production, our experts can help you select the right tools for success.
Let's discuss how we can support your laboratory and manufacturing needs. Contact our team today for a personalized consultation!
Visual Guide
Related Products
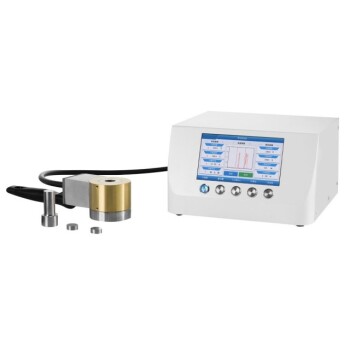
- Small Injection Molding Machine for Lab Use
- Lab Infrared Press Mold
- Ring Press Mold for Lab Applications
- No Demolding Lab Infrared Press Mold for Laboratory Applications
- Special Shape Press Mold for Lab
People Also Ask
- What machine makes molding? Injection Molding Machines for Mass Production
- What is the importance of injection moulding machine? Unlocking High-Volume, Precision Manufacturing
- What is the application of injection moulding machine? Powering Mass Production for Complex Parts
- What are the stages of the molding process? A Guide to Plastic, Metal, and Ceramic Molding
- What is short capacity of injection Moulding machine? Optimize Your Shot Size for Flawless Parts