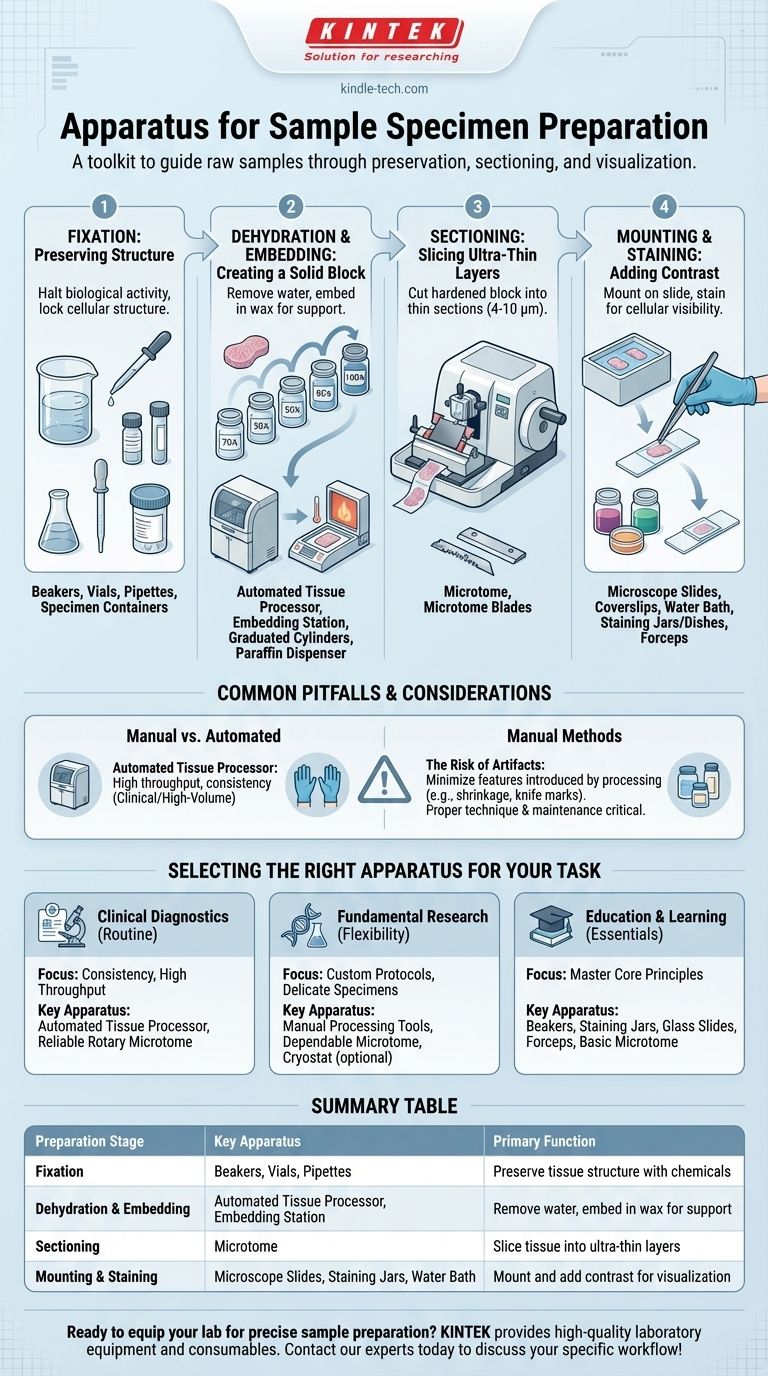
The apparatus used for preparing a sample specimen depends entirely on the type of sample and the analysis to be performed. For preparing biological tissue for light microscopy, the essential equipment includes a microtome for slicing, an embedding station for support, and various labware like microscope slides, staining jars, and forceps for mounting and adding contrast.
The key insight is that sample preparation is a multi-stage process, not a single action. The collection of apparatus used is a toolkit designed to guide a raw sample through the critical stages of preservation, sectioning, and visualization, ensuring the final specimen accurately represents its original state.
The Core Stages of Specimen Preparation
To understand the equipment, you must first understand the workflow. Each piece of apparatus serves a specific function in a sequential process designed to transform a raw tissue sample into a specimen ready for analysis under a microscope.
Fixation: Preserving the Structure
Fixation is the first and most critical step. Its purpose is to halt all biological activity and lock the cellular structures in place, preventing decay and preserving the tissue's architecture.
The apparatus for this stage is relatively simple, focusing on chemical handling. It includes beakers, vials, and specimen containers to hold the tissue and the chemical fixative, such as formalin. Pipettes and graduated cylinders are used for precise measurement of these chemicals.
Dehydration & Embedding: Creating a Solid Block
Water within the tissue is incompatible with the embedding medium (typically paraffin wax) and must be removed. This is followed by embedding the tissue in a solid block of wax, which provides the support needed for slicing.
This is often done using an automated tissue processor, a machine that moves the specimen through a series of graded alcohols (for dehydration) and then into molten wax. For manual processing, a series of jars or containers holding solutions of increasing alcohol concentration is used, followed by a paraffin wax dispenser or embedding station to create the final block.
Sectioning: Slicing Ultra-Thin Layers
This is the most mechanically precise step. The hardened, wax-embedded tissue block must be sliced into sections that are thin enough for light to pass through—typically only 4 to 10 micrometers thick.
The primary apparatus for this is the microtome. This precision instrument holds the specimen block and a very sharp blade, advancing the block by a microscopic amount with each pass to shave off an extremely thin, consistent ribbon of tissue.
Mounting and Staining: Adding Contrast
The thin tissue sections are carefully transferred from the microtome blade onto a glass slide. Because most biological tissues are colorless, they must be stained to make different cellular components visible.
The basic apparatus includes microscope slides and coverslips. A water bath is used to flatten the wax sections before picking them up on a slide. Forceps and dissecting needles are used for manipulation. Staining is accomplished using a series of staining jars or dishes containing different dyes and rinsing solutions.
Common Pitfalls and Considerations
Choosing the right apparatus involves understanding the trade-offs between speed, cost, and the specific demands of your analysis.
Manual vs. Automated Processing
An automated tissue processor offers high throughput, consistency, and reduced hands-on time, which is essential in clinical or high-volume labs.
Manual methods, while more time-consuming and operator-dependent, offer greater flexibility to customize protocols for delicate or unusual research specimens and are significantly less expensive to set up.
The Risk of Artifacts
Every step in preparation can introduce artifacts—features that are not naturally present in the tissue but are instead a result of the processing itself. Examples include shrinkage from dehydration or knife marks from a dull microtome blade.
Proper technique and well-maintained apparatus are critical to minimizing these artifacts, which can otherwise be mistaken for genuine biological structures.
Matching Equipment to the Analysis
The equipment described is standard for light microscopy. Preparing a sample for electron microscopy is far more demanding, requiring different fixatives, resin embedding (instead of wax), and an ultramicrotome capable of cutting sections that are orders of magnitude thinner.
Selecting the Right Apparatus for Your Task
Your choice of equipment should be driven directly by the goal of your work.
- If your primary focus is routine clinical diagnostics: Invest in an automated tissue processor and a high-quality, reliable rotary microtome to ensure consistency and high throughput.
- If your primary focus is fundamental research: Prioritize flexibility with a range of manual processing tools, a dependable microtome, and potentially specialized equipment like a cryostat for sectioning frozen tissue.
- If your primary focus is education and learning: Begin with the essentials for manual processing: beakers, staining jars, glass slides, forceps, and a basic, safe microtome to master the core principles.
Understanding the purpose behind each piece of apparatus transforms sample preparation from a mere procedure into a precise scientific discipline.
Summary Table:
| Preparation Stage | Key Apparatus | Primary Function |
|---|---|---|
| Fixation | Beakers, Vials, Pipettes | Preserve tissue structure with chemicals |
| Dehydration & Embedding | Automated Tissue Processor, Embedding Station | Remove water, embed in wax for support |
| Sectioning | Microtome | Slice tissue into ultra-thin layers |
| Mounting & Staining | Microscope Slides, Staining Jars, Water Bath | Mount and add contrast for visualization |
Ready to equip your lab for precise sample preparation? KINTEK specializes in providing high-quality laboratory equipment and consumables, including microtomes, embedding stations, and full staining setups. Whether you're in clinical diagnostics, research, or education, we have the reliable apparatus you need to ensure accurate and artifact-free results. Contact our experts today to discuss your specific workflow and get a tailored solution!
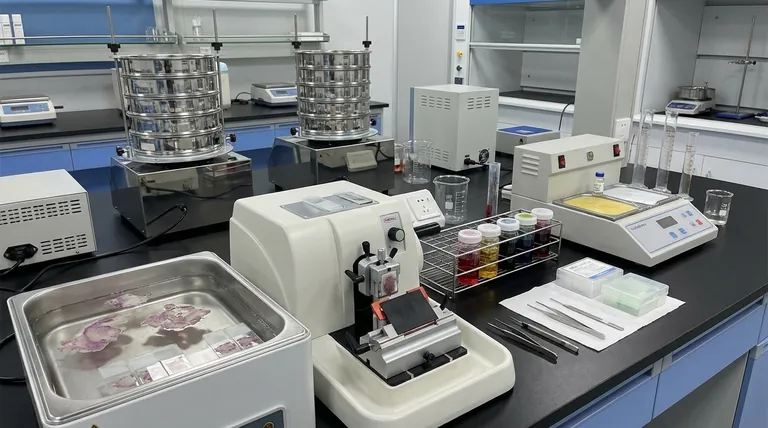
Visual Guide