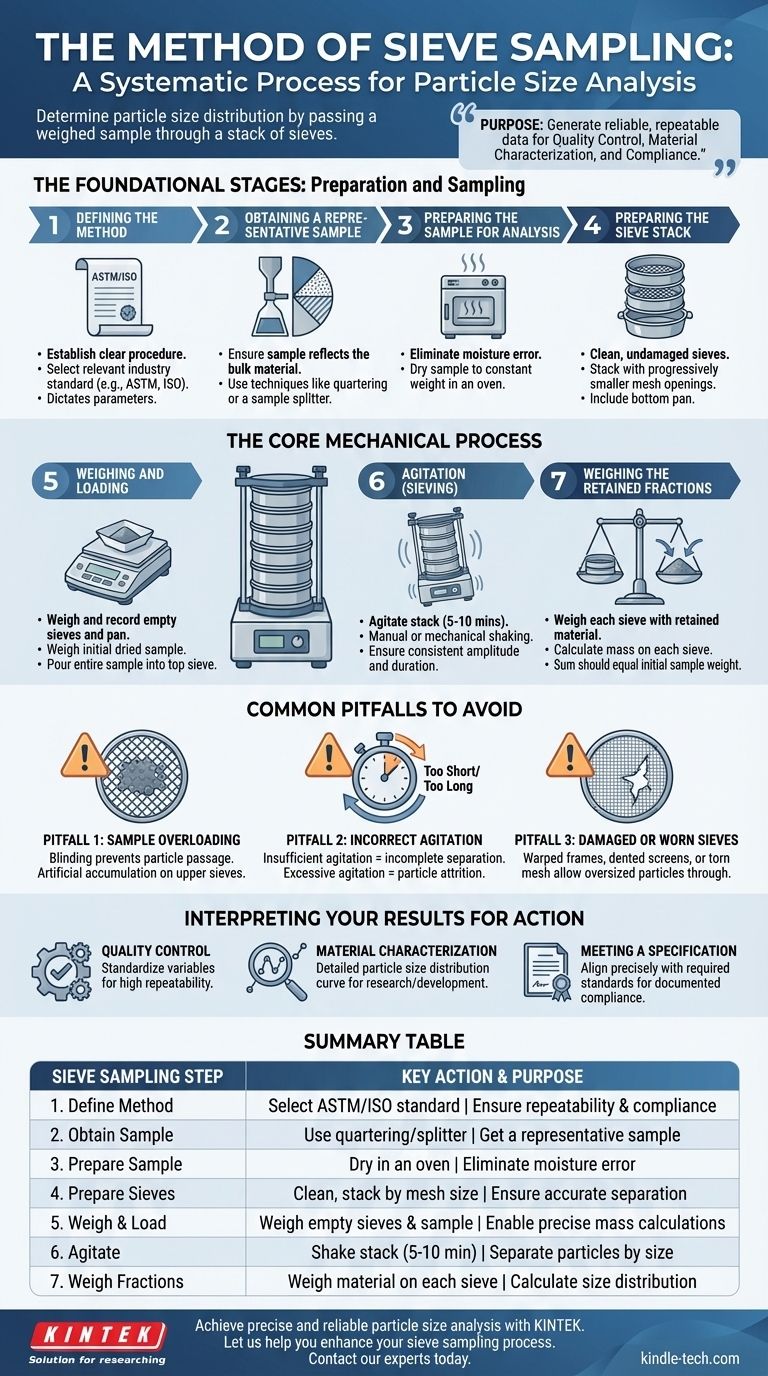
At its core, the method of sieve sampling is a systematic process for determining the particle size distribution of a granular material. It involves passing a precisely weighed sample through a stack of sieves with progressively smaller mesh openings and then weighing the amount of material retained on each sieve. This allows you to quantify the proportion of particles within specific size ranges.
The true purpose of sieve analysis is not merely to separate particles, but to generate reliable, repeatable data for quality control, material characterization, and compliance with industry standards. Success depends entirely on the precision of each step, from obtaining the initial sample to the final calculations.
The Foundational Stages: Preparation and Sampling
The accuracy of a sieve analysis is determined long before any shaking begins. The initial preparation and sampling steps are the most critical for ensuring the final data is meaningful and representative of the bulk material.
Step 1: Defining the Method
Before you begin, you must establish a clear and repeatable procedure. This involves selecting an appropriate industry standard, such as an ASTM (American Society for Testing and Materials) or ISO (International Organization for Standardization) method relevant to your material.
This standard will dictate key parameters, including the required sample mass and the specific sieve sizes needed to characterize your material effectively.
Step 2: Obtaining a Representative Sample
The entire analysis is invalid if the initial sample does not accurately reflect the larger batch of material. A small, non-representative sample will yield precise but useless results.
Techniques like quartering or using a sample splitter are often employed to reduce a large quantity of material down to a manageable and representative test size.
Step 3: Preparing the Sample for Analysis
Moisture is a primary source of error, as it can cause fine particles to clump together and not pass through the sieve mesh correctly.
Therefore, the sample is typically dried in an oven at a specified temperature until it reaches a constant weight. This ensures you are only measuring the mass of the solid particles.
Step 4: Preparing the Sieve Stack
The sieves themselves must be prepared meticulously. This includes ensuring they are clean, dry, and free of any damage like dents or torn mesh.
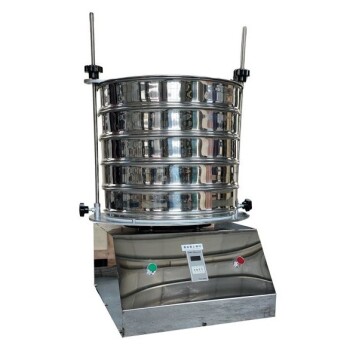
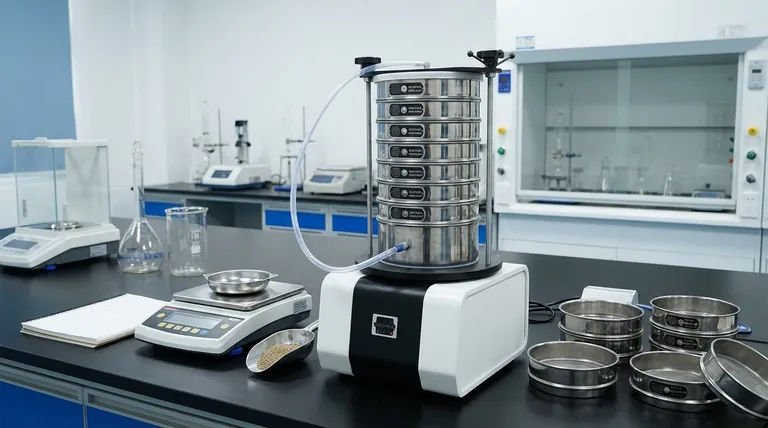
The sieves are then arranged in a stack, with the largest mesh opening at the top and the smallest at the bottom. A solid collection pan is always placed at the very bottom of the stack to catch the finest particles.
The Core Mechanical Process
With the groundwork laid, the mechanical process of separation and measurement can begin. Precision and consistency are paramount in these steps.
Step 5: Weighing and Loading
Using a calibrated scale, you must first weigh and record the mass of each empty sieve and the bottom pan. This is essential for the final calculation.
Next, the prepared, dried sample is weighed to determine its initial total mass. This entire sample is then carefully poured into the top sieve of the stack.
Step 6: Agitation (Sieving)
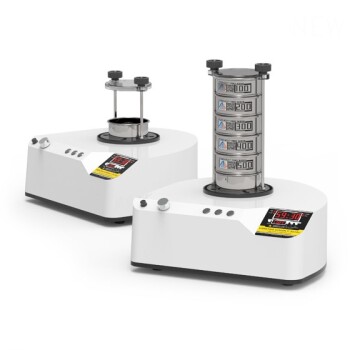
The stack is agitated to cause the particles to bounce, rotate, and present themselves to the mesh openings. This can be done manually, but a mechanical sieve shaker is strongly recommended.
A sieve shaker provides consistent amplitude and duration of shaking, which is critical for ensuring the results are repeatable between different tests and different operators. A typical agitation time is between 5 and 10 minutes.
Step 7: Weighing the Retained Fractions
After agitation is complete, the process of "back weighing" begins. Each individual sieve is weighed with the material it has retained.
The mass of the material on each sieve is calculated by subtracting the empty sieve's initial weight from this final weight. The sum of all these individual fractions should be very close to the initial total sample weight.
Common Pitfalls to Avoid
Even with a defined procedure, several common errors can compromise the integrity of the results. Awareness of these issues is key to generating trustworthy data.
Pitfall 1: Sample Overloading
Pouring too much material into the sieve stack is a frequent mistake. An overloaded sieve prevents particles from reaching the mesh surface, a phenomenon known as blinding.
This results in an artificially high amount of material being retained on the upper sieves, completely skewing the distribution toward coarser sizes.
Pitfall 2: Incorrect Agitation
The duration and intensity of shaking are critical variables. Insufficient agitation leads to incomplete separation, leaving too many particles on upper sieves.
Conversely, excessive agitation can cause particle attrition, where brittle materials break down into smaller pieces, skewing the distribution toward finer sizes.
Pitfall 3: Damaged or Worn Sieves
Sieves are precision instruments. A warped frame, a dented screen, or any tears in the mesh will allow oversized particles to pass through, rendering the results invalid. Regular visual inspection is non-negotiable.
Interpreting Your Results for Action
The data from a sieve analysis is used to make critical decisions. How you approach the method depends on your ultimate goal.
- If your primary focus is quality control: Standardize every variable, especially agitation time and sample weight, and use a mechanical shaker to ensure your results are highly repeatable.
- If your primary focus is material characterization: Select a broad range of sieve sizes to generate a detailed particle size distribution curve, which reveals fundamental properties of the material for research or product development.
- If your primary focus is meeting a specification: Your method must align precisely with the required standard (e.g., ASTM C136 for construction aggregates) to ensure and document compliance.
Mastering the sieve analysis method transforms a simple test into a powerful tool for understanding and controlling your material's physical properties.
Summary Table:
| Sieve Sampling Step | Key Action | Purpose |
|---|---|---|
| 1. Define Method | Select ASTM/ISO standard | Ensure repeatability & compliance |
| 2. Obtain Sample | Use quartering/splitter | Get a representative sample |
| 3. Prepare Sample | Dry in an oven | Eliminate moisture error |
| 4. Prepare Sieves | Clean, stack by mesh size | Ensure accurate separation |
| 5. Weigh & Load | Weigh empty sieves & sample | Enable precise mass calculations |
| 6. Agitate | Shake stack (5-10 min) | Separate particles by size |
| 7. Weigh Fractions | Weigh material on each sieve | Calculate size distribution |
Achieve precise and reliable particle size analysis with KINTEK.
Whether your goal is stringent quality control, detailed material characterization, or ensuring compliance with industry standards, the right equipment is fundamental to your success. KINTEK specializes in high-quality lab equipment and consumables, including precision sieves and mechanical sieve shakers, designed to deliver the accuracy and repeatability your laboratory demands.
Let us help you enhance your sieve sampling process. Contact our experts today to discuss your specific application and find the perfect solution for your laboratory's needs.
Visual Guide
Related Products
- Custom PTFE Teflon Parts Manufacturer for PTFE Mesh F4 Sieve
- Laboratory Test Sieves and Sieving Machines
- Three-dimensional electromagnetic sieving instrument
- Side Window Optical Electrolytic Electrochemical Cell
People Also Ask
- How is PTFE utilized for insulation in Alloy 22 corrosion setups? Ensure Signal Purity & Accuracy
- What is the mesh size of a sieve? A Guide to Particle Size and Sieve Selection
- How do we select a sieve? A Systems-Based Guide to Accurate Particle Separation
- What materials are required for sieving? Achieve Accurate Particle Size Analysis
- What is the device used for sieving? Your Guide to Precision Particle Separation