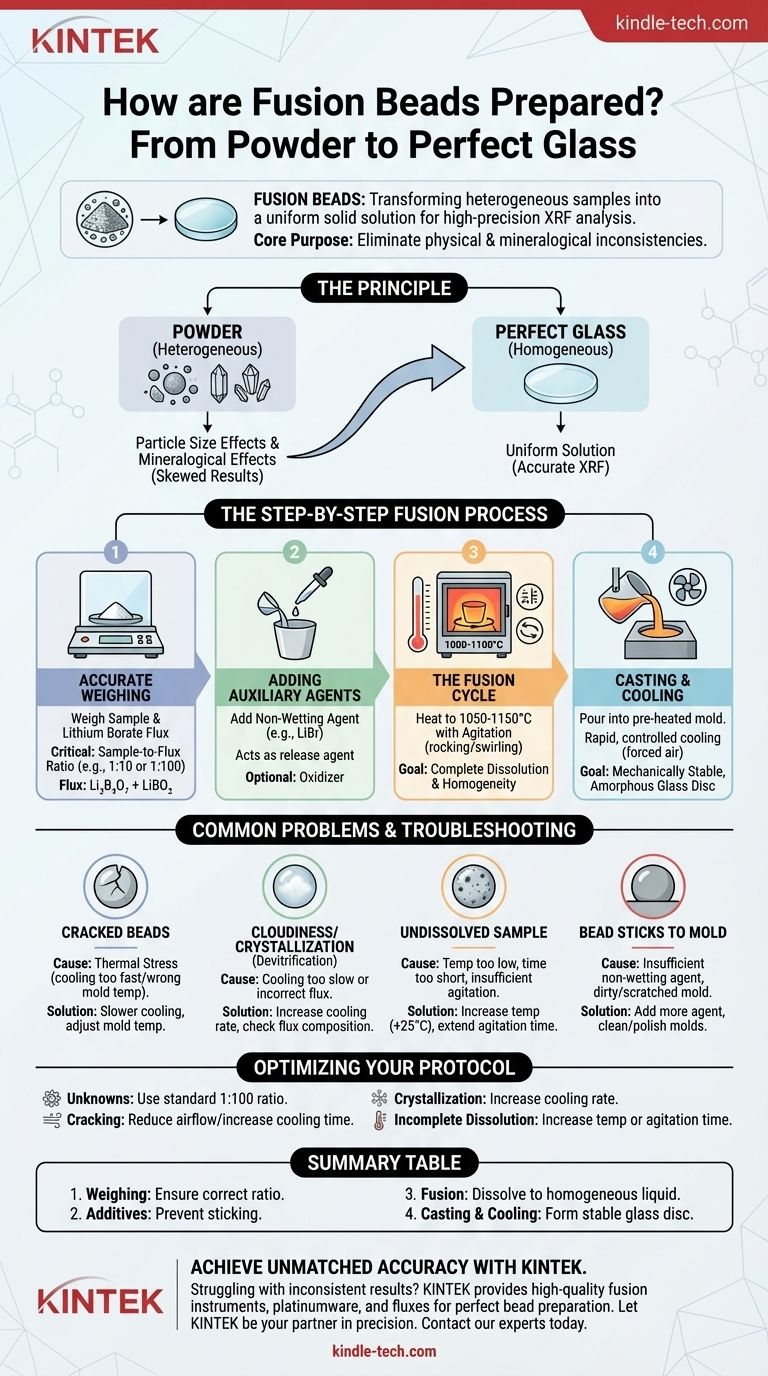
Fusion beads are prepared by accurately weighing a sample and a lithium borate flux, melting them together at high temperatures (around 1000-1100°C) until the sample completely dissolves, and then casting the molten mixture into a mold to cool into a perfectly homogeneous, flat glass disc. This process transforms a heterogeneous powdered sample into a uniform solid solution, ideal for high-precision X-ray Fluorescence (XRF) analysis.
The core purpose of fusion bead preparation is to eliminate physical and mineralogical inconsistencies in a sample. By dissolving the sample into a glass matrix, you remove errors caused by particle size and mineral structure, ensuring the XRF spectrometer measures only the true elemental chemistry.
The Principle: From Powder to Perfect Glass
The goal of borate fusion is to create a sample that is perfectly homogeneous and has a flat, smooth surface for analysis. This is critical for the accuracy of XRF.
Eliminating Particle Size Effects
In raw powders, smaller particles can absorb and emit X-rays differently than larger ones, skewing results. Fusion completely dissolves all particles, making this a non-issue.
Overcoming Mineralogical Effects
Different mineral crystals in a sample can diffract or absorb X-rays in unique ways, creating analytical errors. By destroying the original crystal structure and creating a uniform glass, fusion removes this variable.
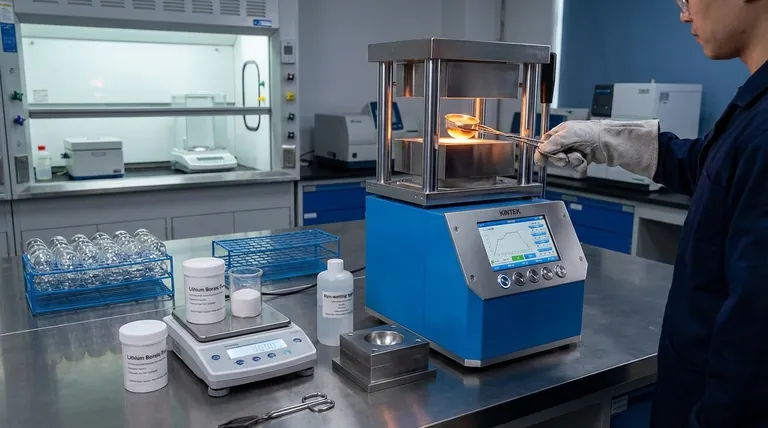
The Step-by-Step Fusion Process
Modern fusion is typically automated using specialized instruments, but the principles and steps remain the same. The process is a carefully controlled sequence of weighing, heating, mixing, and cooling.
Step 1: Accurate Weighing
The process begins with precise weighing of both the sample and the flux. The sample-to-flux ratio (e.g., 1:100 or 1:10) is a critical parameter that dictates the success of the dissolution.
The most common flux is a mixture of Lithium Tetraborate (Li₂B₄O₇) and Lithium Metaborate (LiBO₂).
Step 2: Adding Auxiliary Agents
A non-wetting agent, often a halide salt like Lithium Bromide (LiBr), is added. This crucial additive acts as a release agent, preventing the molten glass from sticking to the platinum crucible or mold.
An oxidizer may also be added at this stage to ensure all elements are in their highest oxidation state, which aids in dissolution.
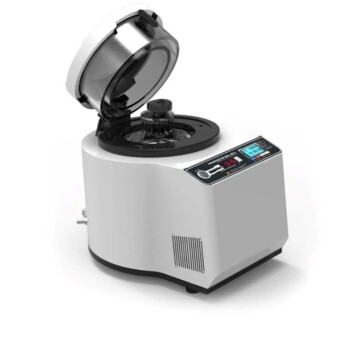
Step 3: The Fusion Cycle
The crucible containing the mixture is placed in a fusion instrument. The machine executes a programmed heating and agitation cycle.
First, the crucible is heated to the target temperature, typically between 1050°C and 1150°C. Once molten, the instrument agitates the crucible (rocking or swirling) to ensure the sample completely dissolves into the flux and the entire mixture becomes homogeneous.
Step 4: Casting and Cooling
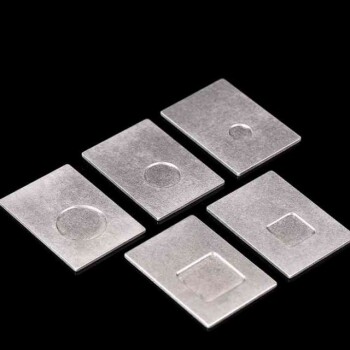
After the agitation phase, the molten glass is poured into a pre-heated platinum mold.
The cooling process is then initiated, often with forced air. This rapid, controlled cooling is vital for creating a mechanically stable, non-crystallized (amorphous) glass disc without cracks.
Common Problems and Troubleshooting
Achieving a perfect bead requires careful control. When issues arise, they typically point to a specific parameter that needs adjustment.
Problem: Cracked or Shattered Beads
This is almost always caused by thermal stress. The cooling rate may be too fast, or the mold temperature might be incorrect, causing the bead to contract unevenly.
Problem: Cloudiness or Crystallization
A cloudy bead indicates devitrification, where the glass has started to crystallize during cooling. This is often caused by a cooling rate that is too slow or an incorrect flux composition for the specific sample type. Crystallized beads will produce inaccurate XRF results.
Problem: Undissolved Sample Material
If you can see specks of the original sample in the finished bead, the dissolution was incomplete. This can be caused by a temperature that was too low, a fusion time that was too short, or insufficient agitation.
Problem: The Bead Sticks to the Mold
This common issue points to an insufficient amount of non-wetting (release) agent. It can also occur if the platinum molds are dirty or scratched, creating anchor points for the glass.
Optimizing Your Fusion Protocol
Adjusting your method depends on the specific materials you are analyzing and the problems you encounter. A methodical approach is key to achieving consistent, high-quality results.
- If your primary focus is accuracy for unknown materials: Begin with a standard 1:100 sample-to-flux ratio and a universal borate flux composition to ensure complete dissolution.
- If you are experiencing cracked beads: Reduce the airflow of the cooling fan or increase the cooling time in your instrument's program to allow for slower, more stable cooling.
- If you see crystallization: Increase the cooling rate or check that your flux composition is appropriate for your sample's chemistry (e.g., acidic vs. basic oxides).
- If you struggle with incomplete dissolution: Increase the fusion temperature by 25°C or extend the agitation time by one minute, testing one variable at a time.
Mastering the fusion technique is the foundation for achieving the highest possible accuracy and precision in your XRF analysis.
Summary Table:
| Step | Key Action | Purpose |
|---|---|---|
| 1. Weighing | Accurately weigh sample & lithium borate flux | Ensure correct sample-to-flux ratio for dissolution |
| 2. Additives | Add non-wetting agent (e.g., LiBr) | Prevent molten glass from sticking to platinumware |
| 3. Fusion | Heat to 1000-1100°C with agitation | Completely dissolve sample into a homogeneous liquid |
| 4. Casting & Cooling | Pour into pre-heated mold & cool rapidly | Form a stable, flat, amorphous glass disc (bead) |
Achieve Unmatched Accuracy in Your XRF Analysis
Are you struggling with sample heterogeneity, mineralogical effects, or inconsistent results? The quality of your fusion bead directly impacts the reliability of your data.
KINTEK specializes in lab equipment and consumables for laboratory needs. We provide the high-quality fusion instruments, platinumware, and fluxes necessary to perfect your fusion bead preparation protocol. Our experts can help you troubleshoot common issues like cracking, crystallization, or incomplete dissolution.
Let KINTEK be your partner in precision. Contact our experts today to discuss your specific application and ensure your lab is equipped for success.
Visual Guide
Related Products
- Laboratory Grinding Mill Mortar Grinder for Sample Preparation
- Vacuum Cold Mounting Machine for Sample Preparation
- Laboratory Sealed Hammer Crusher for Efficient Sample Preparation
- Laboratory Micro Horizontal Jar Mill for Precision Sample Preparation in Research and Analysis
- Laboratory Hybrid Tissue Grinding Mill
People Also Ask
- What is the use of grinding in laboratory? Unlock Accurate & Homogeneous Sample Analysis
- What is the purpose of using a laboratory grinder and standard sieves? Unlock Precise Rice Husk Pretreatment
- What does a grinder do in a laboratory? Achieve Homogeneous Sample Preparation for Accurate Analysis
- What are the different types of laboratory mills? Choose the Right Grinder for Your Sample Material
- What is the role of laboratory-grade grinders and sieves in sample prep? Ensure High-Precision Corrosion Analysis