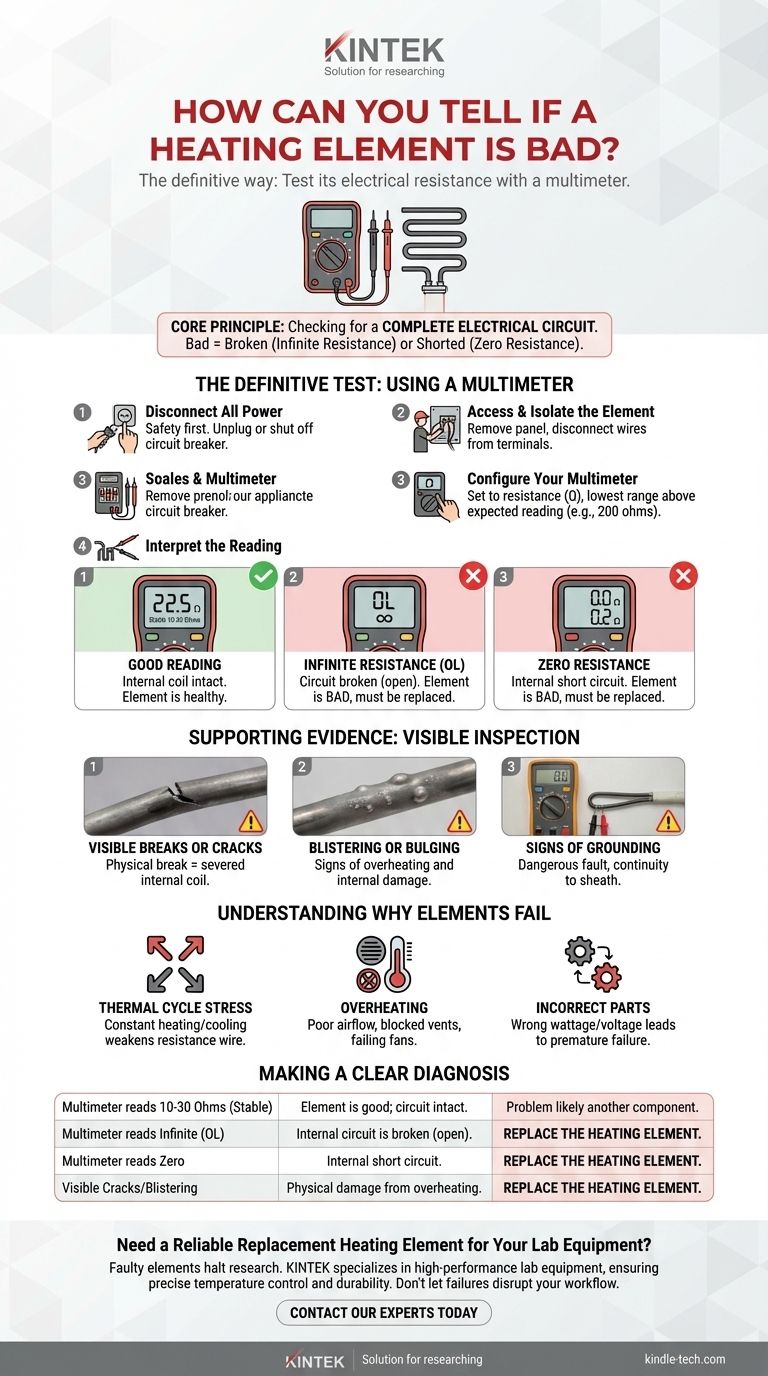
The most definitive way to tell if a heating element is bad is to test its electrical resistance with a multimeter. A functional element will show a specific, stable resistance reading, typically between 10 and 30 ohms, while a faulty one will read either zero (a short) or infinite (a break). Visual inspection for cracks or blisters can also reveal a failed element.
An appliance that doesn't heat is often caused by a failed heating element, but you must test it to confirm. The core principle is checking for a complete electrical circuit; an element is bad if the circuit is broken (infinite resistance) or shorted (zero resistance).
The Definitive Test: Using a Multimeter
The most reliable diagnosis comes from measuring the electrical properties of the element itself. This test removes all guesswork.
Step 1: Disconnect All Power
Safety is non-negotiable. Before you do anything else, unplug the appliance from the wall or shut off its dedicated circuit breaker. Confirm there is no power reaching the unit.
Step 2: Access and Isolate the Element
You will need to gain access to the heating element's terminals. This often requires removing a back or bottom panel on the appliance. Once you can see the terminals, disconnect the wires attached to them so you are only testing the element itself.
Step 3: Configure Your Multimeter
Set your multimeter to the resistance setting, indicated by the ohm symbol (Ω). Choose the lowest range that is higher than the expected reading (the 200 ohms setting is usually perfect for this).
Step 4: Interpret the Reading
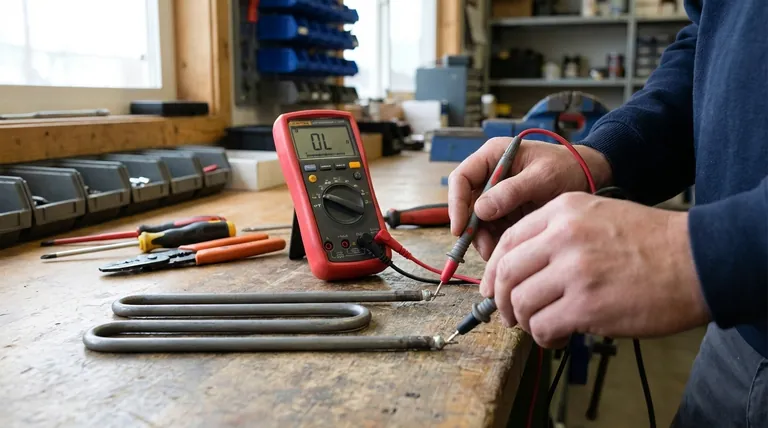
Touch one multimeter probe to each terminal of the heating element. The reading you get tells you its condition.
- A Good Reading: A healthy element will show a resistance reading, typically between 10 and 30 ohms. The exact number isn't as important as getting a stable, specific value. This indicates the internal coil is intact and can resist electricity to generate heat.
- Infinite Resistance (OL): If the multimeter reads "OL" (over limit), "1", or shows a symbol for infinity, the circuit inside the element is broken. Electricity cannot flow through it to generate heat. The element is bad and must be replaced.
- Zero Resistance: If the reading is zero or extremely close to it (e.g., 0.2 ohms), the element has an internal short circuit. While electricity can flow, it's passing through without resistance, meaning it won't generate heat and could trip your breaker. The element is bad and must be replaced.
Supporting Evidence: Visual Inspection
While the multimeter provides a definitive answer, you can often spot a bad element with a visual check.
Obvious Breaks or Cracks
Look for any visible cracks, gaps, or burn-through spots along the element's sheath. A physical break guarantees the internal coil is severed.
Blistering or Bulging
Bumps, bubbles, or blisters on the element's surface are clear signs of overheating and internal damage. The element may still work intermittently, but its failure is imminent.
Signs of Grounding
If the element shows continuity between one of its terminals and the metal sheath or appliance frame, it has "grounded out." This is a dangerous fault that can trip breakers or create a shock hazard.
Understanding Why Elements Fail
Heating elements are simple components, but they operate under constant stress, leading to eventual failure.
The Cycle of Expansion and Contraction
Every time the element heats up, it expands. When it cools, it contracts. This constant thermal stress eventually causes the internal resistance wire to become brittle and break.
Overheating from Poor Airflow
In appliances like dryers or convection ovens, blocked vents or a failing fan can cause the element to overheat beyond its design limits, drastically shortening its life.
The Importance of the Correct Part
Heating elements are designed for specific wattages and temperatures. Using an incorrect or low-quality replacement part can lead to poor performance and premature failure.
Making a Clear Diagnosis
Use these points to make a final, confident decision on whether to replace your heating element.
- If your multimeter reads infinite (OL): The element has a broken internal circuit and must be replaced.
- If your multimeter reads zero: The element is shorted out and must be replaced.
- If you see visible damage like a crack or blister: The element is compromised and should be replaced, even if it still shows a resistance reading.
- If the reading is stable and in the typical range (10-30 ohms): The element is likely functioning correctly, and your heating problem is caused by another component, such as a thermostat, thermal fuse, or control board.
By using a multimeter, you can diagnose your heating element with absolute certainty.
Summary Table:
| Test Result | What It Means | Action Required |
|---|---|---|
| 10-30 Ohms (Stable) | Element is good; circuit is intact. | Problem is likely another component (e.g., thermostat). |
| Infinite Resistance (OL) | Internal circuit is broken (open). | Replace the heating element. |
| Zero Resistance | Internal short circuit. | Replace the heating element. |
| Visible Cracks/Blistering | Physical damage from overheating. | Replace the heating element. |
Need a Reliable Replacement Heating Element for Your Lab Equipment?
A faulty heating element can halt your research and damage sensitive samples. KINTEK specializes in high-performance lab equipment and consumables, ensuring precise temperature control and durability for your laboratory's critical applications. Don't let a failed component disrupt your workflow—contact our experts today for a guaranteed replacement that matches your instrument's specifications!
Visual Guide
Related Products
- Molybdenum Disilicide (MoSi2) Thermal Elements Electric Furnace Heating Element
- Silicon Carbide SiC Thermal Heating Elements for Electric Furnace
- Platinum Sheet Electrode for Laboratory and Industrial Applications
- High-Purity Titanium Foil and Sheet for Industrial Applications
- Laboratory Hydraulic Press Split Electric Lab Pellet Press
People Also Ask
- What is the operating principle of a resistance wire heater? Insights into Joule Heating and Precise Thermal Control
- Do heating elements use a lot of electricity? Understanding High Energy Consumption and Efficient Alternatives
- What is the core function of resistance wire heating elements in a magnesium alloy waste recovery furnace? Expert Guide
- How does resistance heating work? Master the Two Core Methods for Efficient Heat
- What material is used for making heating element? Choose the Right Alloy for Your Application
- What determines the size of a heating element? Key Factors for Optimal Performance & Lifespan
- What makes a heating element go bad? Understanding the Inevitable Failure from Heat and Stress
- What is the purpose of multi-stage electric heating in tensile testing? Achieve Precision in Grain Boundary Analysis

