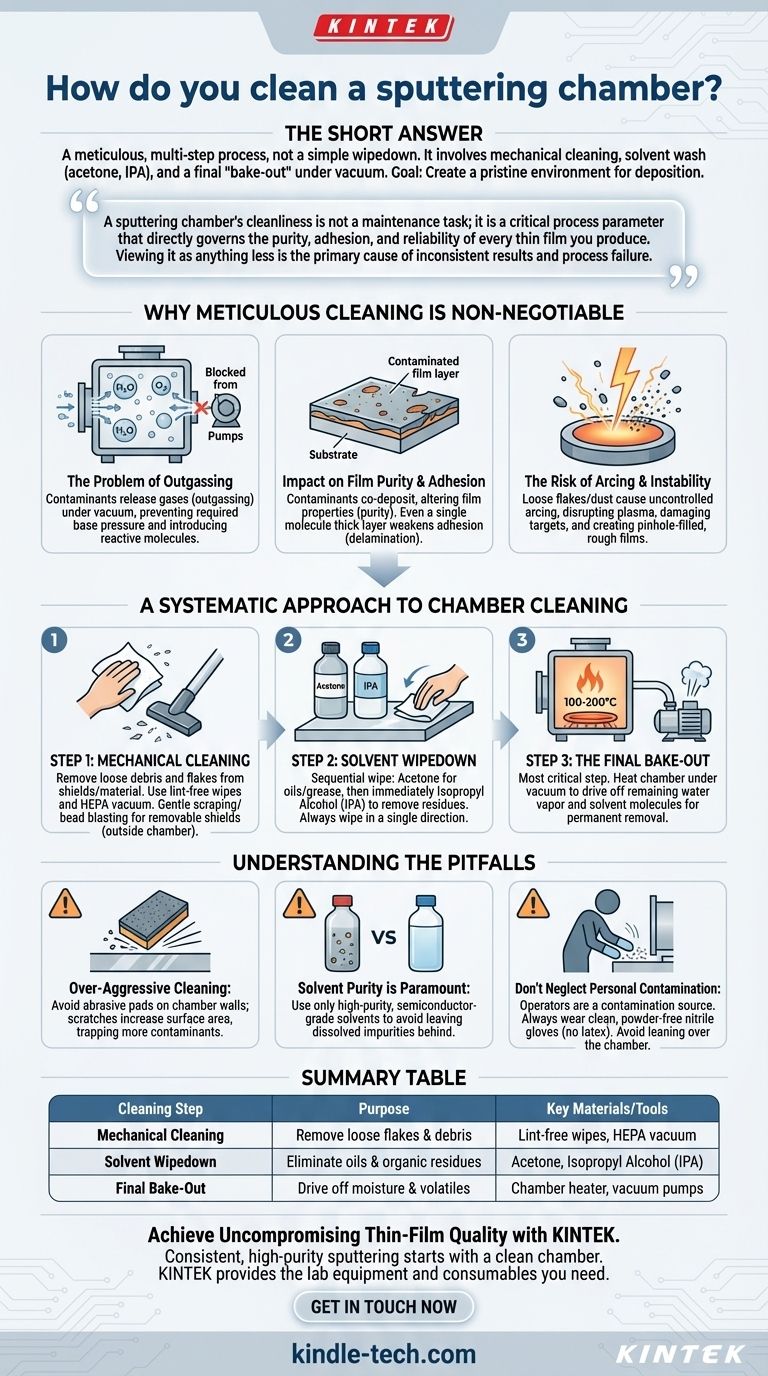
The short answer is that cleaning a sputtering chamber is a meticulous, multi-step process, not a simple wipedown. It involves a sequence of mechanical cleaning to remove flakes, a solvent wash with materials like acetone and isopropyl alcohol to remove oils and residue, and often a final "bake-out" under vacuum to drive off any remaining moisture and volatile contaminants. The goal is to create a chemically and physically pristine environment for deposition.
A sputtering chamber's cleanliness is not a maintenance task; it is a critical process parameter that directly governs the purity, adhesion, and reliability of every thin film you produce. Viewing it as anything less is the primary cause of inconsistent results and process failure.

Why Meticulous Cleaning is Non-Negotiable
A contaminated chamber actively works against your goal of depositing a pure, high-quality film. Any residue left inside from previous runs, handling, or the atmosphere becomes a source of failure during the high-vacuum and plasma-intensive sputtering process.
The Problem of Outgassing
Under high vacuum, contaminants like water vapor, oils, and residual solvents clinging to the chamber walls are released in a process called outgassing. This gas load prevents the system from reaching its required base pressure.
Even a tiny amount of outgassing can introduce reactive molecules like water (H₂O) or oxygen (O₂) into the process, which will contaminate your growing film.
Impact on Film Purity and Adhesion
Contaminant molecules released from the chamber walls will co-deposit alongside your target material. This directly compromises the purity of your film, altering its electrical, optical, and mechanical properties.
Furthermore, a layer of contamination on the substrate surface, even one a single molecule thick, can severely weaken the adhesion of your film, leading to delamination and failure.
The Risk of Arcing and Process Instability
Loose flakes of coating material or dust particles inside the chamber can cause arcing—an uncontrolled electrical discharge between the high-voltage target and the grounded chamber.
Arcing events disrupt the plasma, can damage the target surface, and create a shower of debris that results in rough, pinhole-filled films. This is a primary source of process instability and low device yield.
A Systematic Approach to Chamber Cleaning
A consistent and documented cleaning protocol is essential. The exact steps may vary based on your system and materials, but the principles remain the same. Always wear powder-free nitrile gloves during this process.
Step 1: Mechanical Cleaning
The first step is to remove all visible, loose debris. This includes flakes from chamber shields and old deposition material.
Use clean, lint-free wipes (e.g., polyester or cleanroom-grade) and, if necessary, a dedicated vacuum cleaner with a HEPA filter. For removable shields, gentle scraping or bead blasting (done outside the chamber) may be required for heavy buildup.
Step 2: Solvent Wipedown
After mechanical cleaning, a sequential solvent wipedown removes organic residues and fine particulates.
First, use a lint-free wipe dampened with a high-purity solvent like acetone to remove oils and grease. Immediately follow this with a second wipe dampened with isopropyl alcohol (IPA) or methanol to remove the acetone residue and any remaining water. Always wipe in a single direction.
Step 3: The Final Bake-Out
After the chamber is reassembled and sealed, a bake-out is the final and most critical cleaning step. The chamber is heated (typically to 100-200°C, depending on system limits) while the vacuum pumps run.
This process provides the thermal energy needed to drive off any remaining water vapor and solvent molecules from the chamber surfaces, allowing the pumps to remove them permanently from the system.
Understanding the Pitfalls
Effective cleaning requires avoiding common mistakes that can inadvertently make the situation worse.
Over-Aggressive Cleaning Creates Problems
Using highly abrasive materials like Scotch-Brite™ pads directly on internal chamber walls is a common error. This practice scratches the electropolished stainless steel, dramatically increasing its surface area.
A rougher surface can trap more contaminants and water vapor, making it much harder to achieve a good vacuum in the future. Reserve aggressive abrasives for removable shields only.
Solvent Purity is Paramount
Using low-grade, "hardware store" solvents is a false economy. These solvents contain dissolved impurities and non-volatile residues that will be left behind on your chamber walls after evaporation.
Always use high-purity, semiconductor-grade or HPLC-grade solvents to ensure you are removing contaminants, not just replacing them with new ones.
Don't Neglect Personal Contamination
The operator is a significant source of contamination. Skin oils, fibers from clothing, and even breath can compromise a clean chamber.
Always use clean, powder-free nitrile gloves. Never use latex gloves, as they contain plasticizers that outgas heavily. Avoid leaning over the open chamber, and ensure your tools are as clean as the chamber itself.
Making the Right Choice for Your Goal
Your cleaning strategy should align with your operational objectives.
- If your primary focus is process repeatability: Your goal is to establish and document a rigid cleaning schedule and procedure that is followed every single time.
- If your primary focus is troubleshooting a bad run: Your goal is to perform a full, meticulous deep clean to reset the system to a known-good baseline before running diagnostics.
- If your primary focus is maximizing system uptime: Your goal is to make heavy use of internal chamber shields, which can be swapped and cleaned offline, protecting the main chamber walls from heavy deposition.
Mastering the cleaning protocol is the first step to mastering the art of thin-film deposition itself.
Summary Table:
| Cleaning Step | Purpose | Key Materials/Tools |
|---|---|---|
| Mechanical Cleaning | Remove loose flakes and debris | Lint-free wipes, HEPA vacuum |
| Solvent Wipedown | Eliminate oils and organic residues | Acetone, Isopropyl Alcohol (IPA) |
| Final Bake-Out | Drive off moisture and volatile contaminants under vacuum | Chamber heater, vacuum pumps |
Achieve Uncompromising Thin-Film Quality with KINTEK
Consistent, high-purity sputtering results start with a perfectly clean chamber. KINTEK specializes in providing the high-purity lab equipment and consumables—from semiconductor-grade solvents to durable chamber shields—that your laboratory needs to maintain this critical standard.
Let our experts help you optimize your cleaning protocol and select the right materials to protect your investment and ensure process repeatability. Contact us today to discuss your specific application and keep your deposition process running flawlessly.
Visual Guide
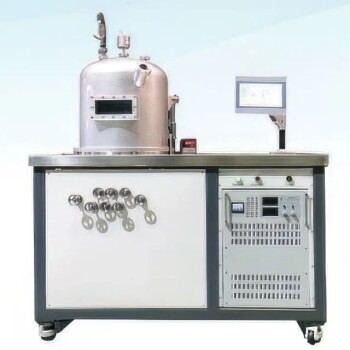
Related Products
People Also Ask
- How expensive is chemical vapor deposition? Understanding the True Cost of High-Performance Coating
- What are the disadvantages and challenges of the HFCVD method? Overcome Growth Limits and Filament Issues
- Why is Chemical Vapor Deposition (CVD) equipment uniquely suited for constructing hierarchical superhydrophobic structures?
- What is the full form of HFCVD? A Guide to Hot Filament Chemical Vapor Deposition
- What types of substrates are used in CVD to facilitate graphene films? Optimize Graphene Growth with the Right Catalyst