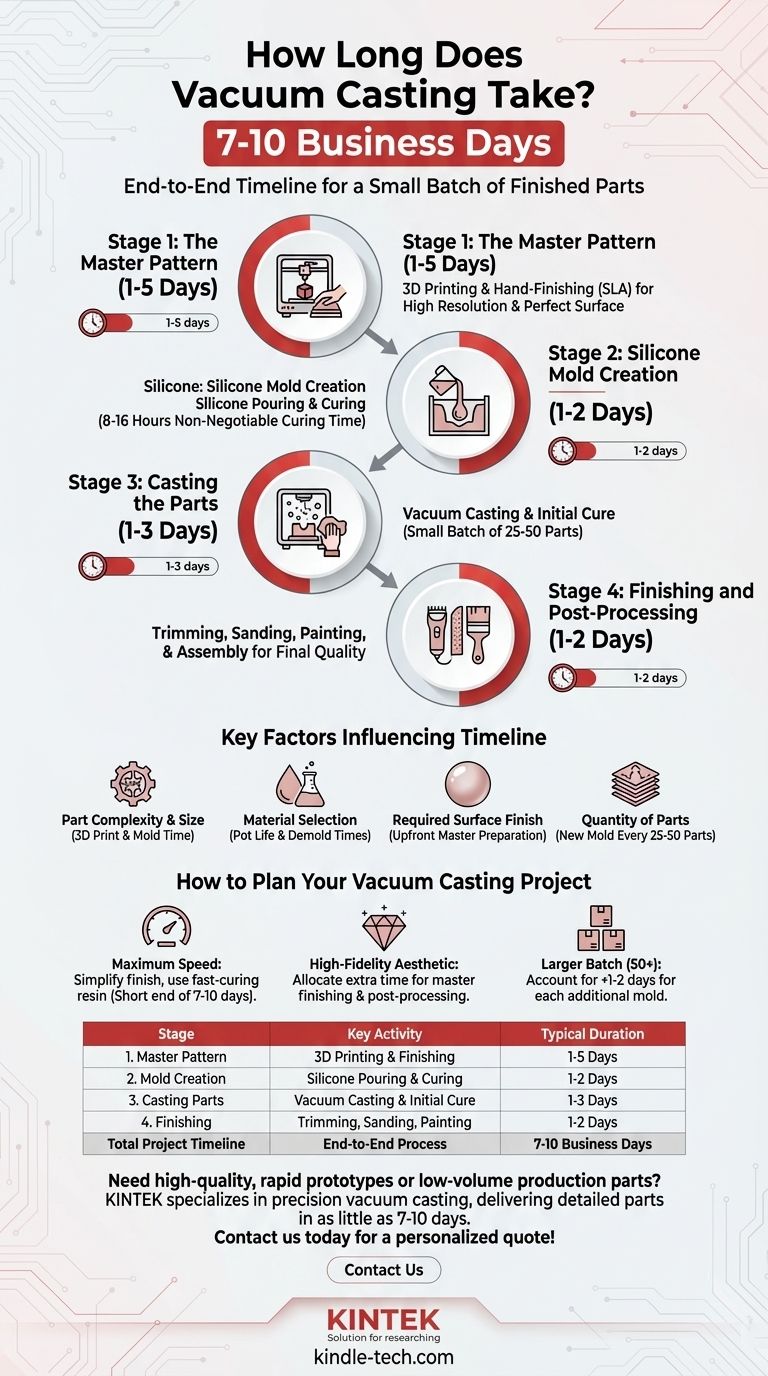
The typical end-to-end timeline for a vacuum casting project is 7 to 10 business days. This timeframe covers the entire process, from creating the initial master pattern to delivering a small batch of finished parts. While the physical act of casting a single part is very fast, the total project duration is primarily dictated by the necessary preparation and curing stages.
The core insight is that vacuum casting's speed is found in producing a batch of high-fidelity parts quickly. However, the total project lead time is governed not by the casting itself, but by the upfront creation of the master pattern and the unavoidable curing time required for the silicone mold.
A Stage-by-Stage Timeline Breakdown
To understand where the time goes, it's essential to view vacuum casting as a multi-stage process. Each stage has its own timeline that contributes to the total duration.
Stage 1: The Master Pattern (1-5 Days)
The first step is to create a perfect, high-quality original part, known as the master pattern. This is the model that will be used to create the silicone mold.
Typically, the master pattern is produced using high-resolution 3D printing, such as SLA (Stereolithography). The time required depends heavily on the part's size and complexity.
After printing, the pattern must be meticulously hand-finished—sanded, polished, and painted—to achieve the desired surface texture. This finishing work is critical, as any imperfection on the master will be replicated in every cast part.
Stage 2: Silicone Mold Creation (1-2 Days)
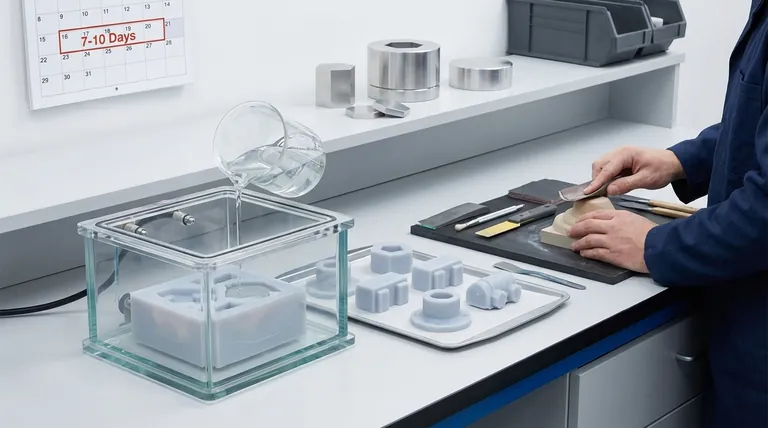
Once the master pattern is perfected, it is suspended inside a casting box, and liquid silicone is poured around it. This is where a significant and non-negotiable waiting period occurs.
The silicone must cure to become a solid, flexible mold. This curing process typically takes 8 to 16 hours at room temperature, though it can be slightly accelerated with heat. Rushing this stage is not possible, as it would compromise the mold's integrity.
Stage 3: Casting the Parts (1-3 Days)
This is the fastest stage of the process. The master pattern is removed from the cured mold, leaving a precise cavity. The mold is then placed in a vacuum chamber, and a polyurethane resin is poured into the cavity.
The vacuum removes all air bubbles, ensuring a perfect, void-free copy. The part itself cures within minutes to a few hours, depending on the material.
A single technician can produce a small batch of 25 to 50 parts in just a few days using one mold.
Stage 4: Finishing and Post-Processing (1-2 Days)
After the parts are de-molded, they undergo final finishing. This can include trimming away excess material (flash), sanding, painting, or installing threaded inserts.
The time required for this stage depends entirely on the complexity of the finishing requirements for the final parts.
Key Factors That Influence Your Timeline
Several variables can either shorten or extend the typical 7-10 day timeframe. Understanding them allows for better project planning.
Part Complexity and Size
Larger and more intricate parts take longer to 3D print for the master pattern and may require more complex mold-making strategies, adding to the overall time.
Material Selection
Different polyurethane resins have varying pot life (working time) and demold times (curing time). While often a matter of hours, specialized materials may require longer curing cycles, extending the production stage.
Required Surface Finish
If your project demands a flawless, high-gloss, or specifically textured finish, more time must be allocated to preparing the master pattern in Stage 1. This upfront investment in time pays off in the quality of the final parts.
Quantity of Parts
A single silicone mold has a limited lifespan, typically yielding 25 to 50 parts before it begins to degrade. If you need 100 parts, a second mold must be created, which essentially repeats the 1-2 day mold-making stage.
How to Plan Your Vacuum Casting Project
Use this timeline understanding to set realistic expectations for your development cycle.
- If your primary focus is maximum speed: Simplify the part's finish requirements and choose a standard, fast-curing resin to keep the project on the shorter end of the 7-10 day spectrum.
- If your primary focus is a high-fidelity aesthetic: Allocate extra time in your plan for meticulous master pattern finishing and any post-processing steps like painting or assembly.
- If your primary focus is a larger batch (50+ parts): Be sure to account for the additional 1-2 days required to create each new silicone mold needed to complete your order.
By understanding these stages, you can accurately forecast your project timeline and leverage vacuum casting for its intended purpose: delivering high-quality, low-volume parts with precision and speed.
Summary Table:
| Stage | Key Activity | Typical Duration |
|---|---|---|
| 1. Master Pattern | 3D Printing & Finishing | 1-5 Days |
| 2. Mold Creation | Silicone Pouring & Curing | 1-2 Days |
| 3. Casting Parts | Vacuum Casting & Initial Cure | 1-3 Days |
| 4. Finishing | Trimming, Sanding, Painting | 1-2 Days |
| Total Project Timeline | End-to-End Process | 7-10 Business Days |
Need high-quality, rapid prototypes or low-volume production parts?
KINTEK specializes in precision vacuum casting services, delivering detailed, functional parts in as little as 7-10 days. Our expertise in lab equipment and consumables ensures your project benefits from superior materials and meticulous craftsmanship.
Contact us today to discuss your project timeline and receive a personalized quote!
Visual Guide