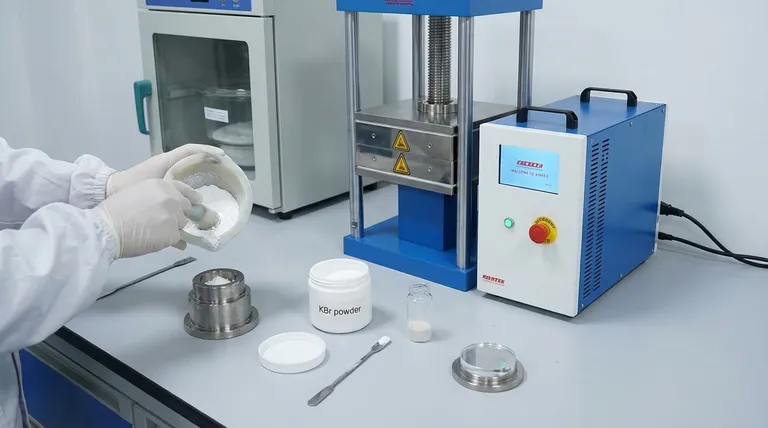
To make a KBr disc for FTIR analysis, you must grind your solid sample into a fine powder, thoroughly mix a small amount with dry KBr powder, and compress the mixture in a die set using a hydraulic press. The goal is to create a thin, transparent pellet where the sample is evenly dispersed within the salt matrix.
The quality of your FTIR spectrum is directly determined by the quality of your KBr disc. While the mechanical process of pressing a disc is simple, the real challenge is eliminating moisture contamination and ensuring the sample is ground finely enough to prevent light scattering, which can obscure or distort your results.
The Foundation: Why Preparation is Everything
Preparing a KBr disc is a foundational technique in infrared spectroscopy. The alkali halide salt (KBr) is used because it is transparent to IR radiation in the typical mid-IR range (4000-400 cm⁻¹) and has a refractive index that can be matched to many organic compounds when prepared correctly.
The Enemy: Moisture
Potassium bromide is hygroscopic, meaning it readily absorbs moisture from the atmosphere. Water has strong IR absorption bands that can easily overwhelm the signals from your sample.
Therefore, your first priority is to create a moisture-free environment. This involves heating the die set, pestle, and mortar (e.g., in an oven or with a heat lamp) before use and using KBr powder that has been stored in a desiccator.
The Correct Sample-to-KBr Ratio
The ideal concentration is approximately 1-2% sample to 98-99% KBr by weight.
Using too much sample will result in an opaque or cloudy pellet that absorbs too much light, leading to flattened, useless peaks. Using too little will produce a weak signal that is difficult to distinguish from background noise.
The Step-by-Step Pellet Pressing Process
Following a precise workflow is critical for reproducibility and achieving a high-quality, transparent disc.
Step 1: Grind the Sample
Use an agate mortar and pestle to grind only the sample (typically 1-2 mg) into a fine, flour-like powder.
The particle size must be smaller than the wavelength of the IR radiation to prevent light scattering, a phenomenon known as the Christiansen effect, which causes severe baseline distortions.
Step 2: Mix with KBr Powder
Add approximately 100-200 mg of dry KBr powder to the ground sample in the mortar.
Mix the two powders gently with a spatula. Do not continue grinding the mixture, as this increases the surface area of the KBr and accelerates moisture absorption from the air. The goal is a homogenous, uniform mixture.
Step 3: Assemble and Load the Die
Ensure the die set's anvils and body are immaculately clean and dry. A small amount of the sample/KBr mixture is all that is needed.
Place just enough powder into the die barrel to form a thin, even layer. Spreading the powder evenly is key to preventing cracks or uneven thickness in the final pellet.
Step 4: Apply Pressure
Transfer the loaded die to a hydraulic press. If your die has a vacuum port, apply a vacuum for a few minutes before pressing to help remove trapped air and residual moisture.
Apply pressure slowly and steadily up to approximately 7-10 metric tons (or ~8,000-10,000 psi). Hold the pressure for 1-2 minutes to allow the KBr to "flow" and form a clear, solid disc.
Finally, release the pressure slowly, carefully disassemble the die, and retrieve your transparent pellet.
Common Pitfalls to Avoid
Even experienced analysts can produce poor pellets. Understanding why they fail is key to mastering the technique.
Pitfall: A Cloudy or Opaque Pellet
This is the most common failure. It is typically caused by one of three things:
- Insufficient pressure: The KBr particles did not fully fuse together.
- Poor grinding: Large sample particles scatter light, causing a cloudy appearance.
- Trapped moisture or air: Using wet KBr or not applying a vacuum can lead to opacity.
Pitfall: Spectral Contamination from Water
If you see broad absorption bands around 3400 cm⁻¹ (O-H stretching) and a sharp band near 1640 cm⁻¹ (H-O-H bending), your pellet is contaminated with water. This is a direct result of using wet KBr or working in a humid environment.
Pitfall: Distorted Baselines (Christiansen Effect)
If your spectral baseline slopes severely or is distorted, especially at the high-frequency end, it is likely due to light scattering from sample particles that were not ground finely enough. The only solution is to remake the pellet with a more thoroughly ground sample.
Making the Right Choice for Your Goal
The level of rigor you apply depends on the purpose of your analysis.
- If your primary focus is quantitative analysis: Precision is everything. You must meticulously weigh your sample and KBr to ensure a known, reproducible concentration.
- If your primary focus is qualitative identification: A visually perfect, transparent pellet is your top priority to ensure spectral artifacts do not obscure or get mistaken for sample peaks.
- If you are troubleshooting a poor spectrum: Remake the pellet. A poorly prepared disc is the most frequent source of error in solid-sample FTIR analysis.
Mastering this technique is a non-negotiable skill for anyone seeking reliable data from FTIR spectroscopy.
Summary Table:
| Key Parameter | Specification |
|---|---|
| Sample Concentration | 1-2% by weight |
| KBr Amount | 100-200 mg |
| Pressing Pressure | 7-10 metric tons (8,000-10,000 psi) |
| Hold Time | 1-2 minutes |
| Critical Factor | Moisture-free environment & fine grinding |
Achieve flawless FTIR results with reliable equipment from KINTEK.
KINTEK specializes in high-quality laboratory equipment and consumables, including durable pellet presses and dies designed for consistent, high-pressure performance. Our products help you eliminate common preparation errors, ensuring your KBr discs are transparent and your spectral data is accurate.
Stop struggling with cloudy pellets and distorted baselines. Contact our experts today to find the perfect press and accessories for your laboratory's specific needs and ensure the integrity of your analytical results.
Visual Guide

Related Products
- Automatic Laboratory Hydraulic Press for XRF & KBR Pellet Press
- Laboratory Hydraulic Pellet Press for XRF KBR FTIR Lab Applications
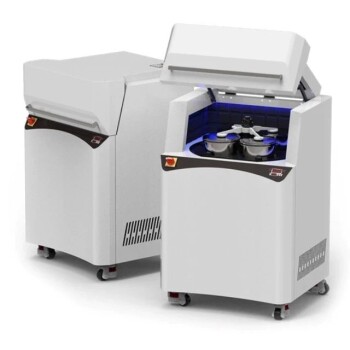
- Laboratory Disc Rotary Mixer for Efficient Sample Mixing and Homogenization
- Graphite Disc Rod and Sheet Electrode Electrochemical Graphite Electrode
- Conductive Carbon Fiber Brush for Static Removal and Cleaning
People Also Ask
- What is the significance of using a laboratory hydraulic press or pelletizer when processing torrefied biomass?
- How does a laboratory hydraulic pellet press contribute to SiCw/2024 aluminum composite preforms? Optimize Densification
- What is the role of a laboratory hydraulic press in preparing MXene films? Essential Sample Prep for Material Science
- What is the function of laboratory hydraulic presses and precision molds? Ensure HEA-Ceramic Composite Integrity
- Why is a laboratory hydraulic press required during the preparation of Ti3AlC2 precursor pellets?