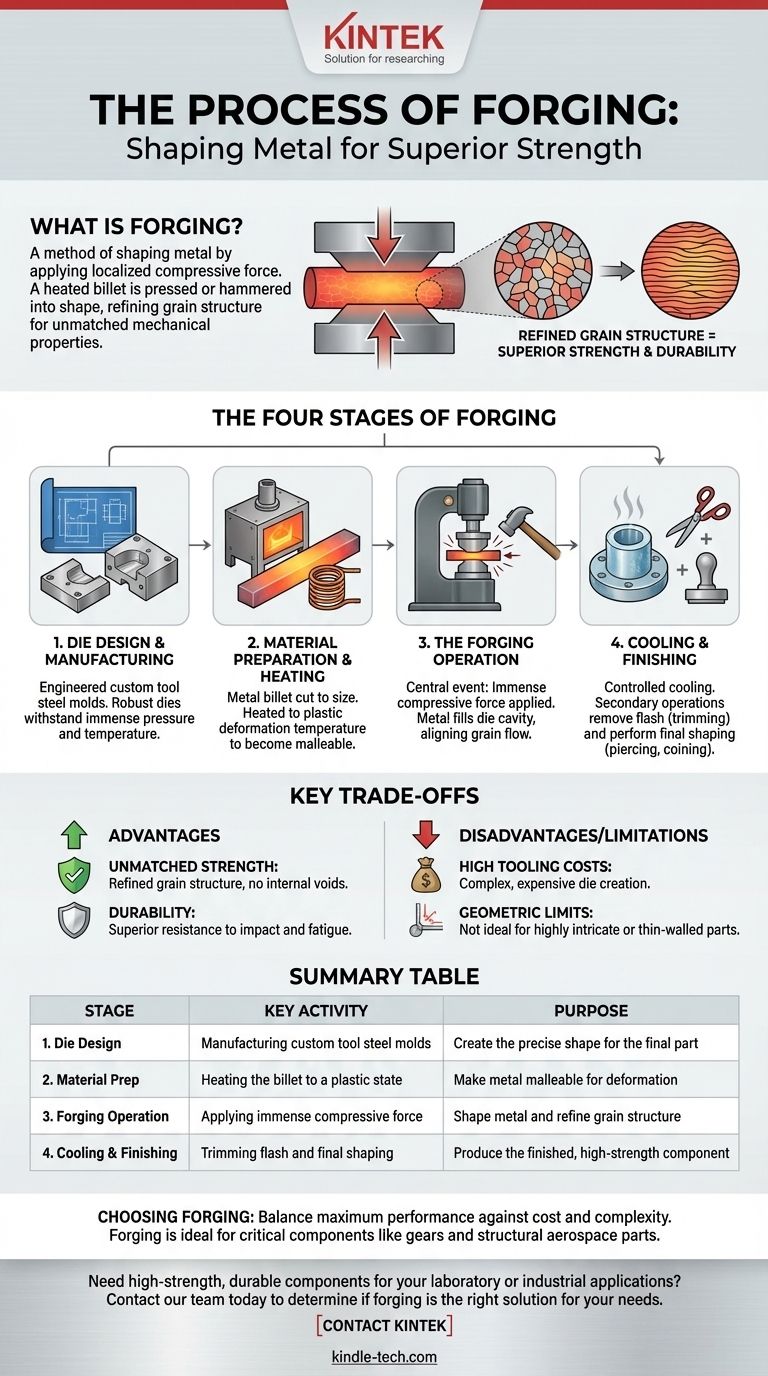
At its core, the forging process is a method of shaping metal by applying localized compressive force. A piece of metal, known as a billet or ingot, is typically heated until it is malleable and then pressed, hammered, or squeezed into a desired shape using custom tools called dies. The process concludes with cooling and finishing operations to produce the final component.
Forging is more than just shaping metal; it is a controlled refinement process. The immense pressure realigns the metal's internal grain structure, creating a continuous and unbroken grain flow that results in parts with superior strength, toughness, and fatigue resistance compared to other manufacturing methods.
The Four Stages of the Forging Process
Forging can be broken down into a sequence of four distinct and critical stages, from initial design to the final finished part. Each step plays a vital role in achieving the final component's desired mechanical properties and dimensions.
Stage 1: Die Design and Manufacturing
The foundation of any forging operation is the die. Dies are the two halves of a custom tool steel mold that will give the forged part its shape.
These dies are engineered based on the customer's specific part design and are machined to precise dimensions. Unlike a simple mold, a forging die set must be incredibly robust to withstand immense pressure and extreme temperatures.
The die set often includes additional components for post-forging steps, such as trimming dies to remove excess material and flattening dies for final shaping.
Stage 2: Material Preparation and Heating
The process begins with a raw piece of metal, typically a bar or block called a billet. This material is cut to a specific volume and weight required for the final part.
The billet is then heated in a furnace or via induction heating. It is brought to its plastic deformation temperature—a state where it becomes soft and malleable but is not molten. Achieving the precise temperature is critical for ensuring the metal flows correctly within the die.
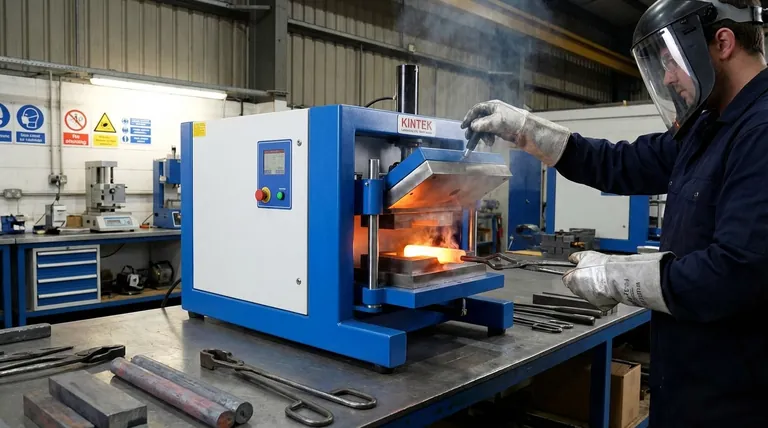
Stage 3: The Forging Operation
This is the central event of the process. The heated billet is quickly transferred and placed on the lower die half within the forging press or hammer.
An immense compressive force is then applied, forcing the plasticized metal to flow and fill every detail of the die cavity. This pressure is what fundamentally transforms the material.
The force refines and directs the metal's internal grain structure, aligning it with the contour of the part. This continuous grain flow is the primary source of a forged component's exceptional strength.
Stage 4: Cooling and Finishing
After the part is formed, it is removed from the die and cooled in a controlled manner to lock in the desired metallurgical properties.
The part is not yet complete. It typically has excess material called flash that squeezed out between the die halves. Secondary operations are required for finishing.
These operations include trimming (shearing off the flash), piercing (punching holes), and coining (stamping for high-precision surfaces). These can be performed consecutively in different machines or integrated into a single, multi-station die.
Understanding the Key Trade-offs
While forging produces exceptionally strong parts, it involves specific trade-offs that make it suitable for some applications but not others.
Advantage: Unmatched Strength and Durability
The primary benefit of forging is the refined grain structure. This creates parts that are significantly stronger, tougher, and more resistant to impact and fatigue than cast or machined components. There are no internal voids or weak points.
Disadvantage: High Initial Tooling Costs
Creating forging dies is a complex and expensive process. As the references note, die sets are more costly than casting molds because they must endure extreme forces and often include trimming and secondary tooling. This high upfront investment makes forging most economical for medium to high-volume production runs.
Limitation: Geometric Complexity
Forging is best suited for parts with a relatively solid cross-section. It is generally not ideal for creating components with highly intricate internal cavities or very thin, complex walls, which are often better served by casting.
Choosing Forging for Your Application
Deciding whether to use forging requires balancing the need for ultimate performance against manufacturing cost and part complexity.
- If your primary focus is maximum strength and fatigue resistance: Forging is the superior choice for critical components like gears, crankshafts, connecting rods, and structural aerospace parts.
- If your primary focus is cost-effectiveness for low-volume or highly complex parts: You should evaluate alternatives like casting or machining, as the high initial die cost of forging may not be justifiable.
Understanding this process empowers you to select the right manufacturing method based on engineering needs, not just the final shape.
Summary Table:
| Stage | Key Activity | Purpose |
|---|---|---|
| 1. Die Design | Manufacturing custom tool steel molds | Create the precise shape for the final part |
| 2. Material Prep | Heating the billet to a plastic state | Make metal malleable for deformation |
| 3. Forging Operation | Applying immense compressive force | Shape metal and refine grain structure |
| 4. Cooling & Finishing | Trimming flash and final shaping | Produce the finished, high-strength component |
Need high-strength, durable components for your laboratory or industrial applications? The forging process delivers unparalleled mechanical properties, but selecting the right manufacturing method is critical. KINTEK specializes in providing robust lab equipment and consumables, backed by deep material science expertise. Let our experts help you determine if forging is the right solution for your project's performance and budget requirements. Contact our team today to discuss your specific needs!
Visual Guide