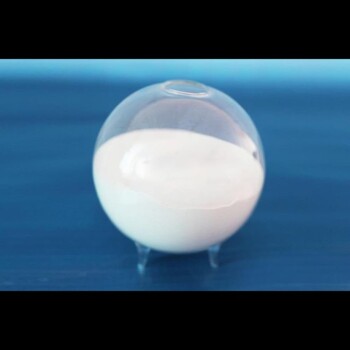
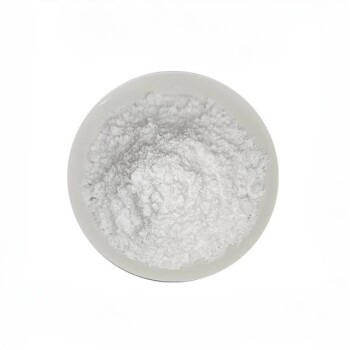
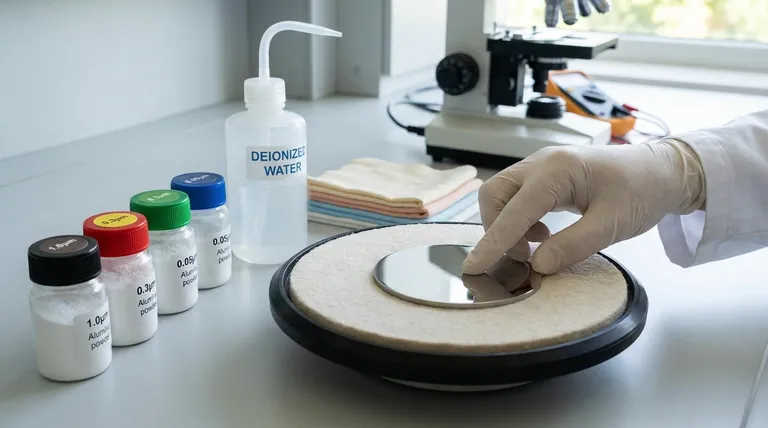
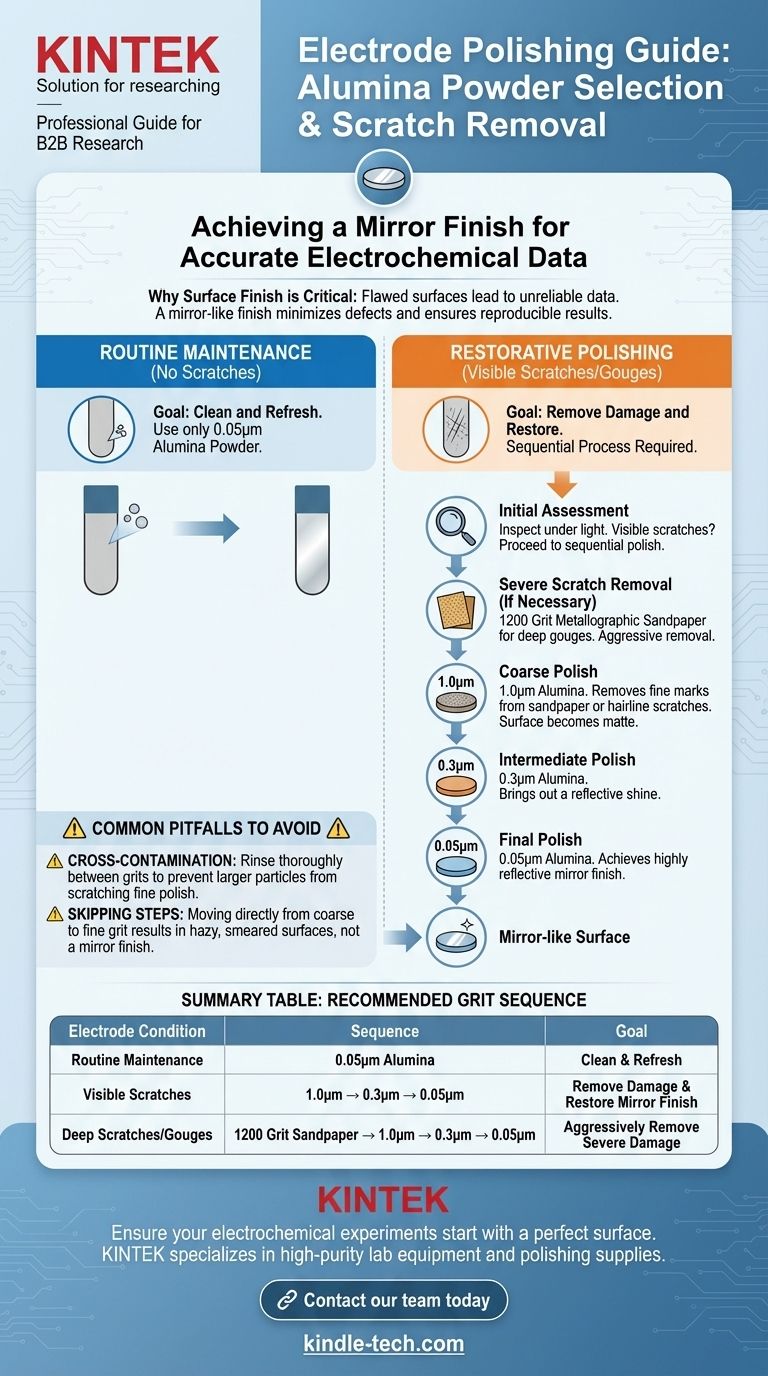
For routine polishing of a disc electrode, you should use a 0.05µm alumina powder. If the electrode has visible scratches, you must use a sequential polishing process, starting with a coarser grit and progressing to finer ones: begin with 1.0µm, followed by 0.5µm, then 0.3µm, and finish with the 0.05µm powder to restore a mirror-like surface.
The goal of polishing is to create a reproducibly smooth, clean, and electrochemically active surface. The choice of alumina grit is not arbitrary; it's a deliberate strategy of controlled abrasion, moving from coarse to fine particles to systematically remove damage and achieve the mirror finish required for accurate measurements.
The Principle: Why Surface Finish is Critical
A flawed electrode surface is a primary source of unreliable electrochemical data. Scratches and imperfections alter the electrode's effective surface area, disrupt mass transport, and create non-uniform current distribution, leading to distorted and non-reproducible results.
The Mirror Finish Standard
The "mirror-like" finish is the visual confirmation that the surface is sufficiently smooth. This state minimizes surface defects, ensuring that the electrochemical behavior you measure is characteristic of your material and analyte, not an artifact of surface damage.
Two Scenarios, Two Protocols
Your polishing strategy depends entirely on the current state of your electrode. You must distinguish between routine maintenance and restorative polishing for a damaged surface. This distinction prevents unnecessary wear on the electrode and saves significant time.
The Step-by-Step Polishing Protocol
Follow this structured approach to ensure a perfect polish every time. The key is to progress methodically from coarser to finer abrasives, cleaning thoroughly between each step.
Step 1: Initial Assessment and Preparation
Inspect the electrode under a good light source. If you see only minor dullness, proceed to routine polishing. If you see distinct lines or scratches, you must perform the full restorative sequence.
Step 2: Severe Scratch Removal (If Necessary)
For deep scratches that are clearly visible, the 1.0µm alumina may not be aggressive enough. In this case, start with 1200 grit metallographic sandpaper.
Use the sandpaper to gently abrade the surface until the major scratches are gone. This is the most aggressive step and should only be performed when absolutely necessary.
Step 3: Coarse Polish (1.0µm Alumina)
This step removes the fine marks left by the sandpaper or removes minor, hairline scratches. Apply a small amount of 1.0µm alumina slurry to your polishing pad and work the electrode over it.
After this step, the deep scratches should be gone, but the surface will appear hazy or matte.
Step 4: Intermediate Polish (0.3µm Alumina)
Thoroughly rinse the electrode and polishing pad to remove all 1.0µm particles. Now, polish with the 0.3µm alumina slurry. This step will begin to bring out a reflective shine on the electrode surface.
Note: Some protocols include a 0.5µm step, but moving from 1.0µm to 0.3µm is a common and effective practice.
Step 5: Final Polish (0.05µm Alumina)
This is the final and most critical step for achieving the mirror finish. After another thorough cleaning, polish with the 0.05µm alumina slurry. The surface should become highly reflective and free of any visible imperfections.
This is also the only step needed for routine, daily polishing to simply clean and reactivate a non-scratched surface.
Common Pitfalls to Avoid
Proper technique is as important as the materials themselves. Avoiding these common mistakes is crucial for achieving consistent results and prolonging the life of your electrode.
Cross-Contamination is Your Enemy
The most common mistake is carrying over larger grit particles into a finer polishing step. A single 1.0µm particle on your 0.05µm pad will create new scratches, undoing all your work.
Always rinse the electrode and change or clean the polishing pad thoroughly between grit sizes.
Skipping Steps Leads to Poor Results
It is tempting to jump from a coarse grit directly to the final 0.05µm polish. This will not work. The fine abrasive cannot effectively remove the larger scratches left by the coarse grit, resulting in a smeared, hazy surface instead of a true mirror finish.
Making the Right Choice for Your Goal
Your polishing strategy should be a direct response to the condition of your electrode.
- If you are performing routine, daily maintenance on an unscratched electrode: Use only the 0.05µm alumina powder to gently clean and refresh the surface.
- If you observe visible scratches or are getting poor, irreproducible data: You must perform the full sequential process, starting with 1.0µm alumina (or 1200 grit sandpaper for deep gouges) and working your way down to 0.05µm.
Proper electrode polishing is the foundational skill that ensures the quality and reliability of your electrochemical data.
Summary Table:
| Electrode Condition | Recommended Grit Sequence | Goal |
|---|---|---|
| Routine Maintenance (No Scratches) | 0.05µm Alumina | Clean and refresh the surface. |
| Visible Scratches | 1.0µm → 0.3µm → 0.05µm Alumina | Remove damage and restore mirror finish. |
| Deep Scratches/Gouges | 1200 Grit Sandpaper → 1.0µm → 0.3µm → 0.05µm | Aggressively remove severe damage. |
Ensure your electrochemical experiments start with a perfect surface. The reliability of your data depends on the quality of your electrode polish. KINTEK specializes in high-purity lab equipment and consumables, including the precise alumina powders and polishing supplies essential for this critical preparation step.
Let our experts help you achieve reproducible results. Contact our team today to find the right polishing materials for your specific application and electrode type.
Visual Guide
Related Products
- High Purity Alumina Granulated Powder for Engineering Advanced Fine Ceramics
- Advanced Engineering Fine Ceramics Low Temperature Alumina Granulation Powder
- Advanced Engineering Fine Ceramics Alumina Ceramic Saggar for Fine Corundum
- High Quality Alumina Ceramic Screw for Engineering Advanced Fine Ceramics with High Temperature Resistance and Insulation
- High Temperature Wear-Resistant Alumina Al2O3 Plate for Engineering Advanced Fine Ceramics
People Also Ask
- What is the most common industrial ceramic? Discover Why Alumina Dominates Countless Applications
- What measures should be taken to prevent cross-contamination when using different sizes of alumina powder?
- What is the function of high-purity alumina powder in pack cementation? Ensure Uniform Aerospace Blade Coatings
- What is the purpose of alumina polishing powder in GCE pretreatment? Master Surface Prep for Electrochemistry
- Why use high-purity alumina plates for sintering porous stainless steel? Ensure Purity & Precision